Majestic SDA-4357R Manual de Usario
Majestic
reproductor de MP3
SDA-4357R
Lee a continuación 📖 el manual en español para Majestic SDA-4357R (44 páginas) en la categoría reproductor de MP3. Esta guía fue útil para 11 personas y fue valorada con 4.5 estrellas en promedio por 2 usuarios
Página 1/44

SDA 4357R
MICROLETTORE MULTIMEDIALE ,
REGISTRAZIONE VOCALE E DISPLAY LCD
Manuale d’istruzioni
Importato da: New Majestic SPA via Rossi
Martini 41, 26013 Crema (CR)
www.newmajestic.com
MADE IN CHINA

2
Descrizione
1.porta USB
2.Accensione/spegnimento
3.presa cufe
4.successivo[ ]/avanzamento [ ]
5.VOL
6.precedente[ ]/ritorno[ ]
7.riproduzione[ ]/pausa[ ]
8.Menu
9.Aggancio per laccetto
10. ingres s o sc he da di memoria
Micro SD
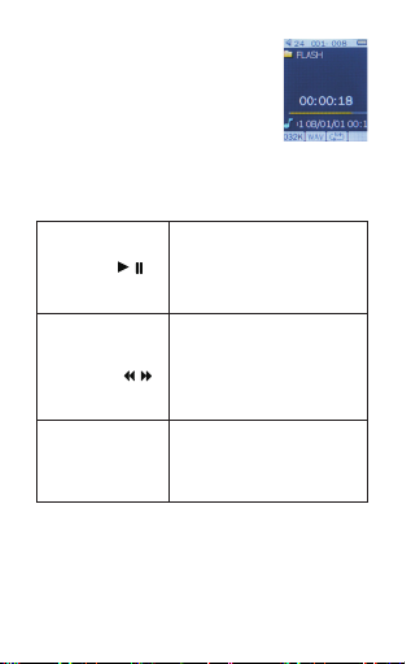
1. Display
Descrizione del display
1.volume
2.posizione della traccia corrente
3.numero totale di tracce
4.durata batteria
5.nome della cartella locale
6.tempo trascorso
7.progressione della riproduzione
8.titolo della canzone
9.bitrate
10.formato le
11.modalità ripetizione
12.equalizzatore

3
2. Funzionamento
2.1 Accensione/spegnimento
Il lettore ha una batteria ricaricabile incorporata. Al primo
utilizzo suggeriamo di ricaricare la batteria a lungo. Per
ricaricare la batteria è necessario collegare il lettore alla
porta USB del computer.
Accensione:
1. spostare il tasto On/Off sulla posizione On.
Spegnimento:
1.tenere premuto il tasto Play ( )/Pausa ( ) nché
appare l’animazione di spegnimento.
2.poi, spostare il tasto on/off sulla posizione off.
2.2 Ricaricare il lettore
Il lettore può essere ricaricato tramite il cavo USB
per collegamento al PC. Prima accendere il PC e poi
collegare il lettore al PC usando il cavo USB fornito. Il
lettore dovrebbe ricaricarsi completamente in 3 o 4 ore.
3. Menu principale
Dopo aver acceso il lettore, potete vedere il menu
principale con 10 sottomenu che vi permettono di
selezionare diverse funzioni e opzioni.
Utilizzando i tasti o è possibile selezionare l’opzione
desiderata, poi premere il tasto menu per confermare la
selezione.
Per accedere al menu principale mentre vi trovate
all’interno di questi sottomenu, premere e tenere premuto
il tasto Menu per alcuni secondi. (premere brevemente il

4
tasto Menu per aprire le opzioni di ogni sottomenu)
Le opzioni disponibili sono:
Musica: selezionare questa opzione per riprodurre la
vostra musica.
Video: quest lmati selezionare a opzione per riprodurre
AMV
Registrazione: selezionare questa per opzione registrare
messaggi vocali tramite il microfono incorporato.
Voce: selezionare questa opzione per riprodurre i
messaggi vocali registrati.
Immagini: selezionare uesta zione er scorrere q op p e
visualizzare le foto.
Testo: selezionare questa opzione per leggere files i
di testo.
Browser: selezionare questa opzione per esplorare le
cartelle inserite nella scheda di memoria.
Impostazioni: selezionare uesta pzione er accedere q o p
alle impostazioni di sistema.
Strumenti: selezionare questa opzione per aggiornare

5
il rmware (attraverso l’upgrade tool fornito con il cd di
installazione) o per controllare lo stato della memoria.
3.1 Modalità musica
Questa opzione del lettore permette di riprodurre le tracce
audio, per attivarla seguire le istruzioni sotto:
1.accendere il lettore e lo schermo
visualizza il menu principale.
2.usando i tasti o , selezionare
l’opzione MUSIC PLAY e premere il
tasto Menu.
3.premere il tasto PLAY (MENU) per
iniziare la riproduzione della prima traccia disponibile.
3.1.1 Funzione dei tasti in modalità musica
Durante la riproduzione delle tracce audio è possibile
attivare i seguenti comandi.
PLAY : premere il tasto play ( ) per iniziare a
riprodurre una canzone. Premere ancora il tasto play
per mettere in pausa, premere di nuovo per riprendere.
Tenere premuto il tasto play a lungo per spegnere il
lettore.
REW & FFWD : premere i tasti o per selezionare
la canzone precedente o successiva. Premere e tenere
premuto i tasti o per tornare indietro o avanzare
velocemente nella traccia.
Volume (VOL): premere il tasto VOL, poi premere il
tasto per aumentare il volume e premere il tasto per
diminuirlo.
3.1.2 Sottomenu musica

6
Premere brevemente il tasto Menu per visualizzare i
sottomenu. Premere i tasti o per scegliere un opzione
e premere il tasto Menu per confermare la propria scelta.
Premendo il tasto Play è possibile tornare alla selezione
precedente. Usare la stessa procedura per navigare
all’interno di ogni sottomenu.
In riproduzione: musica attualmente in riproduzione
Tutti i brani: in questa cartella potete trovare tutte le
canzoni
Album: lista di tutte le canzoni di questo album
Artista: lista di tutte le canzoni di questo artista
Genere: lista di tutte le canzoni dello stesso genere
Nuova Playlist: analizza i brani in memoria e li suddivide
a seconda dell’ID3
Micro SD: lista di tutte le cartelle nella scheda di memoria
Impostazioni riproduzione: è possibile impostare la
modalità di riproduzione (normale, ripeti singola, ripeti
tutto, casuale e intro), l’equalizzatore (normale, rock, pop,
classic, soft, jazz, DBB) e la modalità di ripetizione A-B.
3.1.3 Funzione ripetizione A-B
Il lettore può riprodurre in continuazione un intervallo
specico di una canzone. Durante la riproduzione della
musica, premere il tasto M per selezionare la Mod.
ripetizione (sottomenu “Settaggi”), poi premere il tasto
Menu per impostare il punto di inizio A, e premere il tasto
per impostare il punto di fine B. il lettore riprodurrà
continuamente il contenuto dal punto A al punto B.

7
3.1.4 Visualizzazione testo canzone (Lyric)
Il lettore supporta la visualizzazione del testo della
canzone. Il formato del le deve essere “.lrc” e il nome
del file deve essere esattamente uguale al titolo della
canzone e deve essere salvato nella stessa cartella della
canzone. Per attivare questa opzione, seguire queste
istruzioni:
1.durante la riproduzione della canzone, premere e
tenere premuto Menu per attivare la visualizzazione del
testo.
2.premere brevemente il tasto menu per disattivare la
visualizzazione del testo e tornare al menu riproduzione
musica.
3.2 Modalità Video (AMV)
L’opzione Video permette la riproduzione di file video
nel formato AMV. Per attivare l’opzione seguire queste
istruzioni:
1.accendere il lettore e il display
visualizza il menu principale.
2 . u t i l i z z a n d o i ta s t i o ,
selezionare l’opzione modalità Video e
premere il tasto Menu.
3.premere il tasto Play ( ) per
iniziare la riproduzione del primo video
disponibile.
Nota: il lettore può riprodurre solo video nel formato
AMV convertiti tramite il software fornito sul cd di
installazione.

8
3.2.1 Tasti funzione in modalità movie
Durante la riproduzione video è possibile attivare i
seguenti controlli.
PLAY ( ): premere il tasto play per iniziare la
riproduzione del lmato. Premere ancora il tasto play per
mettere in pausa. Tenere premuto a lungo il tasto play per
spegnere il lettore.
REW & FFWD ( ): premere i tasti o per
selezionare il le precedente o successivo.
Premere e tenere premuto i tasti o per tornare
indietro o avanzare il lmato.
Volume (VOL): premere il tasto VOL, poi premere il
tasto per aumentare il volume e premere il tasto per
diminuirlo.
3.2.2 Sottomenu Video
Premendo brevemente il tasto menu, potete trovare i
seguenti sottomenu Video:
In riproduzione: lmato corrente in riproduzione
Micro SD: lista di tutte le cartelle sulla scheda di memoria
Modalità riproduzione: normale ripetizione singola, elenco
(riprod. cartella), ripetizione cartella, ripeti tutto, casuale e
anteprima.
Elimina le: cancella un lmato specico
Elimina tutto: cancella tutti i lmati
Come convertire i les video in formato AMV
Questo programma è utilizzato per convertire i les video
nel formato AMV, utilizzando lo strumento fornito sul CD.
Formato AVI (.avi)

9
Formato windows media (.asf, .wmv, .wma)
Formato MPEG 1 (.mpg, .mpeg, .dat)
Formato Real Player (.rm)
Formato Quicktime (.mov)
Formato MPEG 2 (.vob)
NOTA: per la conversione di alcuni formati è necessario
aver installato il relativo codec (es. Quicktime © per i
“.mov” o DivX Codec © per alcuni “.avi”)
Installazione: inserire il CD nel vostro computer, eseguire
il le “Setup.exe” nella cartella “Media Player Utilities 4.45”
per avviare l’installazione del programma.
Al termine dell’installazione, potete trovare il programma
chiamato MP3 Player Utilities 4.45 sul vostro computer;
selezionare “AMV&AVI Video Converter” per iniziare la
conversione.
1.avviare il programma “AMV&AVI Video Converter”,
cliccare per scegliere la cartella dove salvare il le
AMV, poi cliccare per selezionare la posizione in cui
si trovano i les originali.

10
2. selezionare il file da convertire (cliccandoci su
una volta), poi cliccare sull’icona , l’icona verrà
evide n z iata e una f inestra di d i alogo v errà
visualizzata. Scegliere le impostazioni del le AMV che si
vuole ottenere e premere OK per confermare.
3.cliccare per iniziare la conversione.
4.dopo la conversione, il file AMV verrà riprodotto
automaticamente.

11
3.3 Registrazione (registrazione messaggi vocali)
Questa opzione permette di registrare messaggi vocali
usando il microfono incorporato. Per registrare un
messaggio vocale seguire le istruzioni:
1.accendere il lettore, il display visualizza il
menu principale
2.usando i tasti
o selezionare l’opzione
record e premere il tasto menu
3.premere il tasto play o record per iniziare
la registrazione
4 . è p o s s i b i l e a s c o l t a r e l a p r o p r i a
registrazione WAV nel sottomenu Voce.

12
Durante la registrazione, premere il tasto play per iniziare
la registrazione. Premere ancora il tasto play per mettere
in pausa. Tenere premuto il tasto menu a lungo per
fermare completamente la registrazione.
Premere brevemente il tasto menu per visualizzare le
impostazioni Micro SD e il Formato di registrazione.
1.utilizzando il menu Micro SD è possibile selezionare la
cartella dalla quale riprodurre le proprie registrazioni.
2.nel sottomenu Formato di registrazione è possibile
impostare il bitrate a 32/64/128/256Kb. Un numero
inferiore (es. 32Kb) comporta una minore qualità di
registrazione ed occupa uno spazio inferiore in memoria,
un numero maggiore (es. 256Kb) comporta una maggiore
qualità di registrazione ed occupa più spazio in memoria.
3.4 Voce (lettore di messaggi registrati )
L’opzione voce permette di riprodurre i messaggi vocali
registrati dal lettore. Per attivare questa opzione, seguire
queste istruzioni:
1.accendere il lettore MP3 e il display
visualizza il menu principale.
2.usando i tasti o selezionare
l’opzione voce e premere il tasto menu.
3.premere il tasto play ( ) per iniziare
la riproduzione della prima registrazione
disponibile.
3.4.1 Tasti funzione in modalità voce
Durante la riproduzione della registrazione è possibile
attivare i seguenti comandi.

13
PLAY ( ): premere il tasto play per iniziare la
riproduzione della registrazione. Premere ancora il tasto
play per mettere in pausa.
REW & FFWD ( o ): premere i tasti o per
selezionare la registrazione precedente o successiva.
Premere e tenere premuto i tasti o per tornare
indietro o avanzare velocemente la registrazione.
Volume (VOL): premere il tasto VOL, poi premere il
tasto per aumentare il volume e premere il tasto per
diminuirlo.
3.4.2 Sottomenu Voce
Premen d o brevem e n te il t asto m enu è possibil e
visualizzare i seguenti sottomenu. Premere i tasti o
per scegliere e premere il tasto Menu per confermare
ogni sottomenu. Usare la stessa procedura per navigare
all’interno dei sottomenu.
Stato Opzioni sottomenu
Menu pausa
Micro SD
Imp. riproduzione
Elimina le
Elimina tutto
Stato Opzioni sottomenu
Durante la
riproduzione
In riproduzione
Micro SD
Imp. riproduzione

14
3.6 Text
L’opzione Text permette di la lettura file di in testo
formato TXT, per attivare questa opzione seguire le
istruzioni:
1.accendere il lettore MP3 e il display
visualizza il menu principale.
2.usando i tasti o selezionare l’opzione
Testo e premere il tasto menu per
confermare.
3.usare i tasti o per scegliere il le.
4.premere il tasto play per iniziare la
lettura del le.
3.6.1 Sottomenu Testo
Premend o breve mente il tasto menu, è pos sibile
visualizzare i seguenti sottomenu.
Stato Opzioni sottomenu
Quando il testo è
in pausa
Micro SD
Set riproduzione
Elimina le
Elimina tutto
●Micro SD: utilizzare questa opzione per muoversi
all’interno delle cartelle salvate sulla scheda di memoria.
●Se t di ri p r odu z ion e : è po s sib i l e s c e gli e r e t r a
riproduzione manuale e automatica. Per la riproduzione
automatica, è possibile impostare il tempo di riproduzione
da 1 a 10 secondi per ogni pagina di testo.

15
● Elimina le: cancellare un le di testo specico.
● Elimina tutto: cancellare tutti i les presenti in memoria.
3.7 Immagini
L’opzione immagini permette di scorrere i les JPG, per
attivare questa opzione seguire le istruzioni:
1.accendere il lettore e il display visualizza il menu
principale.
2.usando i tasti o selezionare
l’opzione Immagini e premere il tasto
menu per confermare.
3.usare i tasti o per scegliere il le.
4.premere il tasto play per scorrere
i les.
3.7.1 Sottomenu Picture
Premend o breve mente il tasto menu, è pos sibile
visualizzare i seguenti sottomenu. Premere i tasti o
per scegliere, e premere il tasto menu per confermare
ogni sottomenu. Premere il tasto play per tornare
al menu precedente. Usare la stessa procedura per
navigare all’interno di ogni sottomenu.
Stato Opzioni sottomenu
Mentre la
riproduzione è
in pausa
Micro SD
Set riproduzione
Modalità scansione
Rotazione automatica
Elimina le
Elimina tutto

16
●Micro SD: utilizzare questa opzione per muoversi
all’interno delle cartelle salvate sulla scheda di memoria.
● Set di produzione: è possibile scegliere tra riproduzione
manuale e automatica. Per la riproduzione automatica,
è possibile impostare il tempo di riproduzione da 1 a 10
secondi per ogni immagine.
● Elimina le: cancellare un le immagine specico.
● Elimina tutto: cancellare tutti i les presenti in memoria
3.8 Browser
Nel menu Browser è possibile esplorare la scheda di
memoria per localizzare tutti i tipi di les: musica, video,
registrazioni, foto e file di testo. Per utilizzare questa
opzione seguire le istruzioni:
1.accendere il lettore e il display visualizza il menu
principale.
2.usando i tasti o selezionare l’opzione Browser e
premere il tasto menu per confermare.
3.muoversi attraverso le cartelle per visualizzare tutti i
tipi di les.
4.premere il tasto menu per confermare.
5.premere il tasto play per tornare al menu
precedente
3.9 Impostazioni
L’opzione Impostazioni permette di accedere alle
impostazioni di sistema del lettore, seguire le istruzioni:
1.accendere il lettore MP3 e il display visualizza il
menu principale.
2 . u sa n d o i t as t i o s e le z io n a r e l’ o pz i on e
Impostazioni e premere il tasto menu per entrare nelle
impostazioni.

18
Dimensioni 4.2 (L) x 8.6 (H) x 0.9 (P) cm
Peso 36.5g
Schermo 1.8” TFT 262.000 colori
Connessione USB 2.0 Full Speed
Scheda di memoria 2GB/4GB/8GB/16GB
Alimentazione Massimo tempo di riproduzione 5 ore
Registrazione
Formato di
registrazione WAV
Massima Potenza
d’uscita cufe
(L) 10mW + (R)
10mW
MP3, WMA
Bit rate MP3 8 – 320 kbps
Bit rate WMA 5 – 384 kbps
FR 20Hz – 20KHz
Rapporto segnale/
disturbo 85dB
Lack delity <+ - 0.05
Formato musica MP3, WMA
Temperatura
operativa 5 – 40°C
Lingue Italiano e Inglese
Requisiti di sistema Windows XP/ Vista/ 7/ 8/10
Nota: le speciche e l’estetica possono essere modicate

19
senza preavviso.
INFORMAZIONE AGLI UTENTI DI APPARECCHIATURE
DOMESTICHE
Ai sensi dell’art. 25 Comma 1 del Decreto Legislativo
14 Marzo 2014, n. 49 "Attuazione delle Direttive
2011/65/UE e 2012/19/UE relative alla riduzione
dell'uso di sostanze pericolose nelle apparecchiature
elettriche ed elettroniche, nonché allo smaltimento
dei rifiuti".
Il simbolo del cassonetto barrato riportato
sull’apparecchiatura o sulla sua confezione indica che il
prodotto alla fine della propria vita utile deve essere
raccolto separatamente dagli altri rifiuti. L’utente dovrà,
pertanto, conferire l’apparecchiatura giunta a fine vita agli
idonei centri di raccolta differenziata dei rifiuti elettronici ed
elettrotecnici, oppure riconsegnarla al rivenditore al
momento dell’acquisto di una nuova apparecchiatura di tipo
equivalente, in ragione di uno a uno.
L’adeguata raccolta differenziata per l’avvio successivo
dell’apparecchiatura dismessa al riciclaggio, al
trattamento e allo smaltimento ambientale compatibile
contribuisce ad evitare possibili effetti negativi
sull’ambiente e sulla salute e favorisce il reimpiego e/o
riciclo dei materiali di cui è composta l’apparecchiatura.

20
CONDIZIONI GENERALI DI GARANZIA PER I
PRODOTTI DELLA New MAJESTIC S.p.A.
Gentile Cliente, La ringraziamo per il Suo acquisto e Le
ricordiamo che il prodotto risponde alle normative vigenti
in fatto di costruzione e di sicurezza.
Nel caso si dovessero riscontrare anomalie o difetti del
prodotto, la New Majestic S.p.A. offre una Garanzia
convenzionale soggetta alle condizioni qui riportate
(precisando che la Garanzia convenzionale lascia
impregiudicati i diritti del consumatore di cui al D.Lgs.
n.206 del 06/09/2005). Per Garanzia si intende
esclusivamente la riparazione o la sostituzione gratuita
dei singoli componenti o dell’intero bene riconosciuti
difettosi nella fabbricazione.
Il periodo di Garanzia non verrà rinnovato o prolungato a
seguito di successiva rivendita, riparazione o sostituzione
Lo smaltimento abusivo del prodotto da parte dell’utente
comporta l’applicazione delle sanzioni di cui alla corrente
normativa di legge.
Eventuali pile o batterie ricaricabili contenute nel
dispositivo devono essere smaltite separatamente negli
appositi raccoglitori preposti alla raccolta delle pile
esaurite.

21
del prodotto stesso.
Le parti riparate, sostituite o il cambio totale del prodotto
saranno garantiti per un periodo di a partire 60 giorni
dalla data della riparazione o della sostituzione e
naturalmente per la restante durata della Garanzia
stessa.
La Garanzia ha validità a partire dalla data comprovata
da un documento scale valido (scontrino scale oppure
fattura d’acquisto) per un periodo di in caso 24 mesi
di acquisto con scontrino fiscale e in caso di 12 mesi
acquisto con fattura scale (partita iva).
Ci sono dei beni che per le loro normali caratteristiche
sono deperibili nel tempo oppure soggetti a consumo e
usura derivanti dall’utilizzo, pertanto, per gli accessori
inclusi nella confezione di vendita la Garanzia ha validità
di 12 mesi.
Un accumulatore ricaricabile si ritiene difettoso e
sostituibile in Garanzia solo quando risulta 12 mesi
interrotto, ossia non eroga più energia e la tensione ai
suoi capi è di Zero Volt. Nel caso in cui la capacità di
erogare energia risultasse ridotta rispetto al prodotto
nuovo (trattasi di consumo/usura) il periodo di Garanzia
sarà di 6 mesi.
Non sono coperti da Garanzia:
- Il deterioramento dovuto ad usura delle parti estetiche
e di tutte le componenti che dovessero risultare difettose
a causa di negligenza o trascuratezza nell’uso, di errata
manutenzione ovvero di circostanze che non possano
ricondursi a difetti di fabbricazione dell’apparecchio.
- I manuali d’uso, i software di terzi, le congurazioni, le

22
applicazioni o i dati scaricati dal cliente.
- I difetti causati da un uso improprio del prodotto
(cadute, pre ssioni, deform azio ni o uso di oggetti
appuntiti).
- Apertura, modica o riparazione del prodotto da parte
di soggetti diversi dal Centro Assistenza Autorizzato.
- I numeri di serie, la data di produzione , il codice a
barre o il codice * che risultano essere cancellati, IMEI
alterati o illeggibili.
Per interventi in Garanzia si prega di rivolgersi presso
uno dei Centri Assistenza Autorizzati
della New Majestic S.p.A., la cui lista completa è
consultabile sul sito , oppure www.newmajestic.com
presso il punto vendita dove è stato acquistato il prodotto,
consegnando il tagliando di Garanzia debitamente
compilato ed allegando lo scontrino fiscale relativo
l’acquisto.
ATTENZIONE:
È opportuno conservare integri sia l’imballo che
tutti gli accessori in esso contenuti, poiché in caso
di invio al laboratorio tecnico è meglio utilizzare la
confezione originale con tutti i suoi accessori.
New Majestic S.p.A.
* IL CODICE IMEI E’ PER SMARTPHONE, TELEFONI &
TABLET 3G

23
DICHIARAZIONE DI CONFORMITA' UE
La sottoscritta Società:NEW MAJESTIC S.P.A.
Via Rossi Martini 41
26013 CREMA (CR)
dichiara sotto la propria responsabilità che il prodotto:
TIPO:
MARCA:
LETTORE MP4
MAJESTIC
MODELLO: SDA 4357R
è costruito in conformità alle seguenti normative:
Final draft ETSI EN 303 345 V1.1.7 (2017-03)
EN 55032 : 2015
EN 55024 : 2010+A1 :2015
EN 55020 : 2007+A12 :2016
soddisfa i requisiti essenziali richiesti dalla direttiva 2014/53/UE, 2011/65/UE,
2013/56/UE e dal regolamento 1907/2006.
Crema, il 08/01/2019
NEW MAJESTIC S.p.A.
Dean Lacchinelli – Presidente
DATA DI PRODUZIONE: 04/2019 19

SDA 4357R
DIGITAL MULTIMEDIA,
VOICE RECORDING AND LCD DISPLAY
Instruction manual
Imported by: New Majestic SPA via Rossi
Martini 41, 26013 Crema (CR)
www.newmajestic.com
MADE IN CHINA

2
Description
1.USB Connector
2.Power ON/OFF
3.Earphone Connector
4.Next [ ] / Forward [ ]
5.Volume
6.Previous [ ] / Backward [ ]
7.Play [ ] / Pause [ ]
8.Menu
9.strip
10.MICRO SD Card Slot
1.Display
Here below you will nd a display description
1.Volume
2.Current Song Location
3.Total Number of Songs
4.Battery Life
5.Local folder name
6.Elapsed Time
7.Play Progress
8.Song Name
9.Play rate
10.File Format
11.Repeat Mode
12.EQ Mode

3
2.Use
2.1Power ON/OFF
The MP3 player has built-in a rechargeable battery. At
the rst use we suggest to recharge the battery for a long
period . To recharge the battery please connect the MP3
player to USB computer port.
Powering On:.
1.Turn on On/Off button to On position
Powering Off:
1.Hold the Play [ ] / Pause [ ] key until the power-off
animation begins
2.Then, turn the On/Off button to Off position.
2.2Recharge the Player
The player can be recharged by the priveded USB cable
by connecting to the PC. .You should rst turn on you PC,
and then connect the player to the PC throught the USB
cable. The player should be fully charged in 3 to 4 hours.
3.Main Menu
After powering on the MP3 player, you can see the main
menu with 10submenus (optional), which allow you to
select different functions and options.
By using the [ ] or [ ] buttons, you can select the
desire option, and then press Menu button to conrm the
selection.
To access at the main menu while you are inside any of
these submenus, press and hold MENU [M] switch for
a few seconds. (Short pressing the MENU [M] switch

4
usually opens the submenu option of each submenus)
The available options are:
Music: Select this option to play song.
Movie: Select this option to play AMV video.
Record: Select this option to record voice messages
by the microphone inside.
Play: Select this option to play recorded voice
message.
Picture: Select this option to browse and see photos.
Text: Select this option to read text.
BROWSER: Select this option to read the memory les
Setting: Select this option to access at system setup.
Tools:
Select this option to upgrade the rmware
(using the tool supplied with installation CD)
or to check the memory status.

5
3.1
Music Mode
The music player option allows playing songs. To activate
this option please follow here below instruction:
1.Power ON the MP3 Player, the
screen will display the main menu
2.By using [ ] or [ ] buttons, select
MUSIC PLAY optionthen press [MENU]
button.
3.Press PLAY [MENU] button to start
to play the rst song available.
3.1.1 Key Function at Music Mode
During the song play it is possible to activate the following controls.
PLAY
[ ► ]:
Press the play [ ] to start to play a song.
Press the play button again to pause the
song. To restart to play the song press
play button again.
Hold the play button for longer time will
eventually turn off the player
REW & FFWD
[ ]
Press [ ] or [ ] to select the previous or
the next song.
Press and Hold the [ ] or [ ] buttons to
rewind or fast forward the song.
Volume (VOL):
First Press [VOL] button ,Then press[ ]
button to increase the volume and press [
]button to decrease the volume.
3.1.2Music Submenu
By short pressing the MENU [M] button to display the
submenus. Press [ ] or [ ] to choose an option, and

6
then press MENU key to conrm your choice. Pressing
Play button it is possible to go back to previous selection.
Use the same technique to navigate inside each of the
submenus.
Now playing:currently Played music
All Song:Under this directory, you can see all songs
Album: List all songs of this album
Artists:List all songs of this atists
Genre: List all songs of this genre
Card folder:List all folders of TF card
Create Playlist: analizes the tracks and it divides them
according to ID3
S e tt i ng : C a n s e t u p p l a y ba c k mod e ( No r m a l,
Rep e a t o ne,Re p e at all, S h uffle, I n t r o),Eq u a lizer
(Natural,Rock,POP,Classic, Soft,Jazz,DBB), Replay A-B mode.
3.1.3 A-B Repeat Function
The player can loop-playing a specied music interval of
a song. While Playing Music, Press M button to select
replay mode ,then press the MENU button .set repeat
start point A, and then press [ ]button to set repeat
end point B. The player will then loop-play the content
between point A and B.
3.1.4 Lyric Display
The Player supports Lyrics Display, in which the lyrics
would be shown synchronizing with the actually lyrics
of the song. The le format should be “.Irc”, and the le
name should be exactly the same with the song’s file
name and place within the same folder with the song. To
activate this option, please follow here below instruction:

7
1.While playing song, press and hold MENU [M] to
activate lyrics display
2.Short press MENU [M] button again to de-activate
the lyrics display and return to music play menu.
3.2 AMV Video Mode
The MOVIE allows to play movies in AMV Format. To
activate this option please follow here below
instruction:
1.Power ON the MP3 Player, the
screen will display the main menu.
2.By using [] or [
] buttons,
select AMV MODE option then press
MENU button.
3.Press PLAY [
] button to start
to play the rst movie available.
Note
the unit can only play video in AMV format,
converted through the supplied software in the
installation CD.
3.2.1 Key Function at Movie Mode
During the Video play it is possible to activate the
following controls.
PLAY [ ]:
Press the PLAY [ ] to start to
play a movie. Press the play button
ag ain to paus e the m ovie . Hold
the play button for longer time will
eventually turn off the player
REW & FFWD
[ ]
Press [ ] or [ ] to select the
previous or the next movie.
Press and Hold the [
] or [ ]
buttons to rewind or fast forward the
movie.

8
Volume (VOL):
First Press [VOL] button ,Then press
[ ] button to increase the volume
and press [ ]button to decrease
the volume.
3.2.2 AMV Submenu
By short pressing the MENU [M] button, you can nd the
following AMV submenus:
Now playing:
Now playing video
Card folder:
List all folders of TF card
Repeat:
Normal, Repeat one, Folder, Repeat folder, Repeat
all, Random, Intro
Delete File:
Delete specic video you want.
Delete All:
Delete all videos using this option
How to transfer the movie le to AMV
This program allows you to convert movie les into AMV
les, using the tool supplied on CD.
AVI format (.avi)
Windows Media format (.asf, .wmv & .wma)
MPEG 1 format (.mpg, mpeg &.dat)
Real player format (.rm)
Quicktime format (.mov)
MPEG 2 format (.vob)
NOTE: to convert some formats it is necessary to have
installed the related codec (for example Quicktime © for
“.mov” les or DivX Codec© for some “.avi” les)

9
Installation: Put the assorted CD driver onto your
computer CD disk driver, open the folder “Media Player
Utilities 4.45”, select it to run the installation program.
After installation nish, you could nd the program named
MP3 Player Utilties 4.45 in your computer, select the
“AMV&AVI Video Converter” to start your converting.
1. Run “AMV&AVI Video Converter”, click to choose
the folder where to save the AMV les, then click to
select the position where the original les are.
2. Select the le to be converted, then click , the
icon will be highlighted into and a dialog box will
show. Choosing the setting of the AMV le you want to
obtain, then click OK to conrm.

10
3. Click to start converting.
4. After convert, the AMV les will be played automatically.
3.3 Record (Voice messages recorder)
This option allows to record voice messages by using

11
the microphone inside. To record voice message, please
follow here below instruction:
1.Power ON the MP3 Player, the screen will
display the main menu.
2.By using [
] or [] buttons, select
RECORD option then press MENU button.
3.Press PLAY [] button to start to
recording.
4.You can listen to your wav le under the
VOICE submenu
During recording, Press the PLAY [ ] to start
recording. Press the play button again to pause recording.
Hold the MENU button for longer time will eventually
stop recording.
By short pressing the MENU [M] button, you can nd the
CARD FOLDER and Record Format settings.
1.Under the Micro SD submenu you can choose the
folder you want to play
2.Under the Record Format submenu, you can choose
the bitrate between 32/64/128/256Kb. Low bitrate (for
ex.32Kb) will be low recording quality and occupy small
memory, high bitrate (for ex.256Kb) will be high recording
quality and occupy more memory.
3.4 Voice (Voice Messages Player)
The voice option allows to play the voice messages
recorded by the MP3 Player. To activate this option,
please follow here below instruction:
12
1.Power ON the MP3 Player, the screen
will display the main menu.
2.By using [] or [] buttons, select
VO I CE optio n t h en press [MENU]
button.
3.Press PLAY [] button to start to
play the rst recording available.
3.4.1 Key Function at VOICE Mode
During the recording play it is possible to activate the
following controls.
PLAY [ ]:
Press the PLAY [
] to start
to play a recording. Press the
play button again to pause the
recording.
REW & FFWD
[ ]
Press [
] or [] to select the
previous or the next
recording.
Press and Hold the [
] or []
buttons to rewind or fast forward
the recording.
Volume (VOL+ and
VOL-):
First
Press [VOL] button ,Then
press[
] button to increase the
volume and press [
]button to
decrease the volume.
3.4.2 VOICE Submenu
By short pressing the MENU [M] button, you can find
the following music submenus. Press [ ] and [
]
to choose, and then press Menu key to confirm each

13
submenus. Use the same technique to navigate inside
each of the submenus.
Status Submenu Options
While Music
is paused
Card Folder
Playback Setting
Delete File
Delete All
Status Submenu Options
While
music is on
Now playing
Card Folder
Playback Setting

14
following music submenus.
Status Submenu Options
While TEXT is
paused
Card Folder
Play Set
Delete File
Delete All
●Card Folder:
Under this directory, you can choose the folder you
want to play
●Play Set:
You can choose between manual play and auto play.
For auto play, you can set the playing time from 1 to 10
seconds for each page of the TEXT.
●Delete File:
Delete specic text le you want.
●Delete All:
Delete all text les using this option.
3.7: PICTURE
The Picture option allows browsing JPG le. To activate
this option please follow here below instruction:
1.Power ON the MP3 Player , the
screen will display the main menu.
2.By using the [ ] or [ ] buttons
select Picture, and then press [MENU]
button to conrm
3.Use [ ] or [
] buttons to choose
the le
4.Press PLAY [ ] button to start
browsing the le
3.6.1 E-Book Submenu
By [M] short pressing the MENU button, you can find the

15
3.7.1PICTURE Submenu
4.By short pressing the MENU [M] button, you can nd
the following picture submenus. Press [
] or [ ] to
choose, and then press [MENU] key to confirm each
submenus. Press play [] to return to the previous
menu. Use the same technique to navigate inside each of
the submenus.
Status Submenu Options
While Picture is
paused
CARD Folder
Play Set
Delete File
Delete All
●Card Folder:
Under this directory, you can choose the folder you
want to play
●Play Set:
You can choose between manual play and auto play.
For auto play, you can set the playing time from 1 to 10
seconds for each picture.
Delete File:
Delete specic image le you want.
●Delete All:
Delete all Photos using this option.
3.8: Browser
Under the Browser menu, you can explore both the
card memory, to locate all kinds of les including music,
videos, recordings, photos, text les , And you can enjoy
these les directly from here. To use it, please follow here
below instruction:
1.Power ON the MP3 Player, the screen will display
Especificaciones del producto
| Marca: | Majestic |
| Categoría: | reproductor de MP3 |
| Modelo: | SDA-4357R |
¿Necesitas ayuda?
Si necesitas ayuda con Majestic SDA-4357R haz una pregunta a continuación y otros usuarios te responderán
reproductor de MP3 Majestic Manuales

9 Septiembre 2024
8 Septiembre 2024
8 Septiembre 2024
8 Septiembre 2024
8 Septiembre 2024
8 Septiembre 2024
8 Septiembre 2024
8 Septiembre 2024
8 Septiembre 2024
8 Septiembre 2024
reproductor de MP3 Manuales
- reproductor de MP3 Sony
- reproductor de MP3 Samsung
- reproductor de MP3 AEG
- reproductor de MP3 Philips
- reproductor de MP3 Panasonic
- reproductor de MP3 Grundig
- reproductor de MP3 JVC
- reproductor de MP3 Medion
- reproductor de MP3 Olympus
- reproductor de MP3 Topcom
- reproductor de MP3 Xiron
- reproductor de MP3 Yarvik
- reproductor de MP3 Acer
- reproductor de MP3 Aiwa
- reproductor de MP3 Akai
- reproductor de MP3 Apple
- reproductor de MP3 Archos
- reproductor de MP3 OneConcept
- reproductor de MP3 BenQ
- reproductor de MP3 Lexibook
- reproductor de MP3 Hitachi
- reproductor de MP3 Thomson
- reproductor de MP3 Lenco
- reproductor de MP3 Pyle
- reproductor de MP3 Manta
- reproductor de MP3 Tevion
- reproductor de MP3 OK
- reproductor de MP3 Hyundai
- reproductor de MP3 Trekstor
- reproductor de MP3 ECG
- reproductor de MP3 Bush
- reproductor de MP3 RCA
- reproductor de MP3 Sencor
- reproductor de MP3 GPX
- reproductor de MP3 Sitecom
- reproductor de MP3 Logik
- reproductor de MP3 Energy Sistem
- reproductor de MP3 Polaroid
- reproductor de MP3 Denver
- reproductor de MP3 Nilox
- reproductor de MP3 Soundmaster
- reproductor de MP3 Brigmton
- reproductor de MP3 Sunstech
- reproductor de MP3 Sylvania
- reproductor de MP3 SanDisk
- reproductor de MP3 GoGEN
- reproductor de MP3 Marquant
- reproductor de MP3 Coby
- reproductor de MP3 Envivo
- reproductor de MP3 TakeMS
- reproductor de MP3 Vieta
- reproductor de MP3 Pure
- reproductor de MP3 Audiovox
- reproductor de MP3 Insignia
- reproductor de MP3 Tesco
- reproductor de MP3 Transcend
- reproductor de MP3 Boss
- reproductor de MP3 Terris
- reproductor de MP3 Tascam
- reproductor de MP3 Naxa
- reproductor de MP3 Ricatech
- reproductor de MP3 Konig
- reproductor de MP3 Teac
- reproductor de MP3 Mpman
- reproductor de MP3 Sweex
- reproductor de MP3 Ices
- reproductor de MP3 Trevi
- reproductor de MP3 Technaxx
- reproductor de MP3 D-Link
- reproductor de MP3 Natec
- reproductor de MP3 Nikkei
- reproductor de MP3 Iriver
- reproductor de MP3 Freecom
- reproductor de MP3 Ingo
- reproductor de MP3 Creative
- reproductor de MP3 Roadstar
- reproductor de MP3 Scott
- reproductor de MP3 Apart
- reproductor de MP3 Difrnce
- reproductor de MP3 Hipstreet
- reproductor de MP3 Irradio
- reproductor de MP3 Rio
- reproductor de MP3 Emtec
- reproductor de MP3 Victory
- reproductor de MP3 Memup
- reproductor de MP3 Geemarc
- reproductor de MP3 Qware
- reproductor de MP3 Jobo
- reproductor de MP3 Intenso
- reproductor de MP3 Odys
- reproductor de MP3 Tom-tec
- reproductor de MP3 Zipy
- reproductor de MP3 SPC
- reproductor de MP3 Cowon
- reproductor de MP3 Zolid
- reproductor de MP3 Native Union
- reproductor de MP3 Power Dynamics
- reproductor de MP3 Woxter
- reproductor de MP3 Citronic
- reproductor de MP3 Becker
- reproductor de MP3 Packard Bell
- reproductor de MP3 Napa
- reproductor de MP3 MPIO
- reproductor de MP3 Orava
- reproductor de MP3 Maxfield
- reproductor de MP3 Oregon Scientific
- reproductor de MP3 Lavod
- reproductor de MP3 Loomax
- reproductor de MP3 Dane Elec
- reproductor de MP3 Sensation
- reproductor de MP3 Visual Land
- reproductor de MP3 Finis
- reproductor de MP3 Ultra
- reproductor de MP3 Jaton
- reproductor de MP3 ZipyLife
- reproductor de MP3 Astell&Kern
- reproductor de MP3 HiFiMAN
- reproductor de MP3 Oracom
- reproductor de MP3 Media-tech
- reproductor de MP3 Q-BE
- reproductor de MP3 On-Hold Plus
- reproductor de MP3 Truly
- reproductor de MP3 OXX Digital
- reproductor de MP3 PENTAGRAM
- reproductor de MP3 D-Jix
- reproductor de MP3 Konig Electronic
- reproductor de MP3 JWIN
- reproductor de MP3 MiTone
- reproductor de MP3 Yakumo
- reproductor de MP3 Onearz
Últimos reproductor de MP3 Manuales
27 Octubre 2024
26 Octubre 2024
24 Octubre 2024
24 Octubre 2024
24 Octubre 2024
24 Octubre 2024
23 Octubre 2024
23 Octubre 2024
20 Octubre 2024
19 Octubre 2024