Netgear Wall-Plug Satellite Model RBW30 Manual de Usario
Netgear
Casa inteligente
Wall-Plug Satellite Model RBW30
Lee a continuación 📖 el manual en español para Netgear Wall-Plug Satellite Model RBW30 (164 páginas) en la categoría Casa inteligente. Esta guía fue útil para 4 personas y fue valorada con 4.5 estrellas en promedio por 2 usuarios
Página 1/164
User Manual
Orbi WiFi System
Models:
Orbi Router Model RBR50
Orbi Satellite Model RBS50
Orbi Router Model RBR40
Orbi Satellite Model RBS40
Orbi Router Model RBR20
Orbi Satellite Model RBS20
Orbi Wall-Plug Satellite Model RBW30
NETGEAR, Inc.
350 E. Plumeria DriveMay 2020
San Jose, CA 95134, USA202-11675-13

Support and Community
Visit netgear.com/support to get your questions answered and access the latest
downloads.
You can also check out our NETGEAR Community for helpful advice at
community.netgear.com.
Regulatory and Legal
Si ce produit est vendu au Canada, vous pouvez accéder à ce document en français
canadien à https://www.netgear.com/support/download/.
(If this product is sold in Canada, you can access this document in Canadian French at
https://www.netgear.com/support/download/.)
For regulatory compliance information including the EU Declaration of Conformity, visit
https://www.netgear.com/about/regulatory/.
See the regulatory compliance document before connecting the power supply.
For NETGEAR’s Privacy Policy, visit https://www.netgear.com/about/privacy-policy.
By using this device, you are agreeing to NETGEAR’s Terms and Conditions at
https://www.netgear.com/about/terms-and-conditions. If you do not agree, return the
device to your place of purchase within your return period.
Trademarks
©NETGEAR, Inc. NETGEAR and the NETGEAR Logo are trademarks of NETGEAR, Inc.
Any non-NETGEAR trademarks are used for reference purposes only.
2
Orbi WiFi System

Contents
Chapter 1 Overview
LED behavior.........................................................................................9
Orbi WiFi system LEDs....................................................................9
Optional Orbi add-on satellite LEDs..............................................9
Connect your router...........................................................................10
Place your satellite..............................................................................11
Sync your Orbi satellite......................................................................11
Sync a satellite from an Orbi wi system.....................................11
Sync an add-on satellite................................................................12
Log in to your router and add satellites to your network..........12
Set up an Ethernet backhaul connection.........................................14
Download the NETGEAR Orbi app..................................................16
Chapter 2 Connect to the Network and Access the Router
Connect to the network.....................................................................18
Wired connection..........................................................................18
WiFi connection.............................................................................18
WiFi connection using WPS..........................................................19
Labels 19...................................................................................................
Types of logins....................................................................................20
Use a web browser to access the router..........................................20
Use the automatic Internet setup option....................................20
Log in to the Orbi router web interface......................................22
Change the language........................................................................22
Chapter 3 Specify Your Internet Settings
Use the Setup Wizard.........................................................................25
Manually set up the Internet connection.........................................25
Specify an Internet connection without a login..........................25
Specify an Internet connection that uses a login.......................27
Requirements for entering IPv6 addresses.....................................28
Specify IPv6 Internet connections................................................29
Use auto detection for an IPv6 Internet connection..................30
Use auto conguration for an IPv6 Internet connection...........31
Set up an IPv6 6rd tunnel Internet connection...........................32
Set up an IPv6 6to4 tunnel Internet connection.........................34
3

Set up an IPv6 pass-through Internet connection......................36
Set up an IPv6 xed Internet connection....................................37
Set up an IPv6 DHCP Internet connection..................................38
Set up an IPv6 PPPoE Internet connection..................................40
Change the MTU size.........................................................................41
Chapter 4 Control Access to the Internet
Enable Circle smart parental controls..............................................45
Enable Circle smart parental controls using the Orbi router web
interface 45..........................................................................................
Enable Circle smart parental controls using the Orbi app.......46
Activate and manage NETGEAR Armor using the Orbi app........47
Allow or block access to your network............................................47
Use keywords to block Internet sites...............................................48
Delete keywords that are used to block Internet sites...................50
Avoid blocking on a trusted computer............................................50
Block services from the Internet.......................................................51
Manage network access control lists...............................................52
Schedule when to block Internet sites and services......................53
Set up security event email notications.........................................54
Chapter 5 Optimize Performance
Enable or disable WiFi Multimedia Quality of Service...................57
Improve network connections with Universal Plug and Play........58
Enable or disable daisy-chain topology..........................................59
Enable or disable implicit beamforming.........................................60
Enable or disable MU-MIMO............................................................60
Enable or disable fast roaming.........................................................61
Chapter 6 Specify Network Settings
View or change WAN settings..........................................................64
Manage Dynamic DNS.......................................................................65
Set up a new Dynamic DNS account...........................................65
Specify a DNS account that you already created.......................66
Change the Dynamic DNS settings.............................................67
Set up a default DMZ server..............................................................68
Change the router’s device name....................................................69
Change the LAN TCP/IP settings......................................................69
Use the router as a DHCP server......................................................71
Disable the DHCP server feature in the router...............................72
Manage reserved LAN IP addresses................................................73
Reserve an IP address....................................................................73
Edit a reserved IP address............................................................74
Delete a reserved IP address entry..............................................74
4
Orbi WiFi System

Manage custom static routes............................................................75
Set up a static route.......................................................................75
Edit a static route...........................................................................76
Delete a static route.......................................................................77
Specify basic WiFi settings................................................................78
Change the WiFi password or security level...................................79
Set up a guest WiFi network.............................................................80
View or change advanced WiFi settings..........................................81
Use the router as a WiFi access point..............................................82
Set up router mode............................................................................83
Generate a new backhaul password................................................84
Set up a bridge for a port group or VLAN tag group....................84
Set up a bridge for a port group..................................................85
Set up a bridge for a VLAN tag group........................................85
Enable British Telecom IGMP proxy support..................................87
Chapter 7 Manage Your Network
Update the router and satellite rmware........................................89
Check for rmware updates.........................................................89
Manually update rmware............................................................90
Manually update satellite rmware..............................................90
Manually update router rmware................................................91
Change the admin password............................................................92
Enable admin password reset...........................................................92
Reset the admin password................................................................93
View router status and usage information.......................................94
Display Internet port statistics...........................................................94
Check the Internet connection status..............................................95
View satellite status............................................................................96
View and manage logs of router activity.........................................97
View devices connected to the network or edit device
information 98..........................................................................................
View devices connected to the network.....................................98
Edit device information on the Attached Devices page...........99
View satellites connected to the network or edit satellite
information 99..........................................................................................
View satellites connected to the network...................................99
Edit satellite information that displays on the Attached Devices
page 100..............................................................................................
Manage the Orbi Outdoor Satellite LED lighting........................101
Enable the Sync button...............................................................101
Turn the satellite LED lighting on or off....................................102
Set LED lighting brightness........................................................103
Schedule when to turn on LED lighting....................................103
5
Orbi WiFi System

Monitor Internet trafc.....................................................................105
Set your time zone, adjust for daylight saving time, or change the
NTP server.........................................................................................106
Manage the router conguration le.............................................107
Back up settings...........................................................................107
Erase the current conguration settings...................................107
Restore conguration settings...................................................108
Set up remote management...........................................................109
Use remote access...........................................................................110
Remotely access your router using the Orbi app.........................110
Chapter 8 Customize Internet Trafc Rules for Ports
Manage port forwarding to a local server.....................................112
Set up port forwarding to a local server...................................112
Add a custom port forwarding service.....................................113
Edit a port forwarding service....................................................114
Delete a port forwarding entry..................................................115
Application example: Make a local web server public...........115
How the router implements the port forwarding rule.............116
Manage port triggering...................................................................116
Add a port triggering service.....................................................117
Disable port triggering or change the time-out period.........118
Application example: Port triggering for Internet Relay Chat.118
Chapter 9 Use VPN to Access Your Network
Set up a VPN connection.................................................................121
Specify VPN service in the router...................................................121
Install OpenVPN software...............................................................122
Install OpenVPN software on your Windows-based computer 122.
Install OpenVPN software on your Mac computer..................125
Install OpenVPN software on an iOS device............................126
Install OpenVPN software on an Android device....................126
Use a VPN tunnel on your Windows-based computer................127
Use VPN to access your Internet service at home........................129
Set up VPN client Internet access in the router........................129
Block VPN client Internet access in the router..............................130
Use a VPN tunnel to access your Internet service at home.........130
Chapter 10 Troubleshooting
Quick tips...........................................................................................133
Sequence to restart your network.............................................133
WiFi settings.................................................................................133
Network settings..........................................................................133
The router and satellite do not sync..............................................133
6
Orbi WiFi System

You cannot log in to the router.......................................................135
You cannot access the Internet.......................................................135
Troubleshoot Internet browsing.....................................................136
Troubleshoot PPPoE........................................................................137
Troubleshoot WiFi connectivity......................................................138
Troubleshoot your network using the ping utility........................138
Test the LAN path to your router...............................................138
Test the path from your computer to a remote device...........139
Chapter 11 Supplemental information
Factory settings for Orbi routers....................................................142
Factory settings for Orbi router model RBR50.........................142
Factory settings for Orbi router model RBR40.........................143
Factory settings for Orbi router model RBR20.........................145
Factory settings for Orbi satellites..................................................147
Factory settings for Orbi satellite model RBS50......................147
Factory settings for Orbi satellite model RBS40......................149
Factory settings for Orbi satellite model RBS20......................151
Factory settings for Orbi wall plug satellite model RBW30....153
Technical specications for Orbi routers......................................155
Technical specications for Orbi router model RBR50...........155
Technical specications for Orbi router model RBR40...........156
Technical specications for Orbi router model RBR20...........157
Technical specications for Orbi satellites....................................159
Technical specications for Orbi satellite model RBS50........159
Technical Specications for Orbi Router Model RBS40.........161
Technical specications for Orbi router model RBS20...........162
Technical specications for Orbi wall plug satellite model
RBW30 163...........................................................................................
7
Orbi WiFi System

1
Overview
The Orbi™ WiFi System creates dedicated high-speed WiFi connections to your Internet
service. The Orbi router connects to your modem or gateway. The Orbi satellite extends
the WiFi signal throughout your home.
This manual describes how to manage your Orbi WiFi System from your Orbi router
web interface. You can manage any add-on Orbi satellite from the Orbi router web
interface.
If you own one of the following add-on Orbi satellites, you can nd more information
about your satellite from its user manual, which is available at
https://www.netgear.com/support/:
•Orbi Outdoor Universal Satellite (model RBS50Y)
•Orbi Voice (model RBS40V)
This chapter contains the following sections:
• LED behavior
• Connect your router
• Place your satellite
• Sync your Orbi satellite
• Set up an Ethernet backhaul connection
• Download the NETGEAR Orbi app
For more information about the topics covered in this manual, visit the support website
at https://www.netgear.com/support/.
Note: This manual refers to all Orbi router models as the and refers to all Orbirouter
satellite models (including the Orbi wall plug satellite) as the .satellite
8
LED behavior
When you sync a satellite to the router, the LED behavior for a satellite that comes in a
WiFi system is different from the LED behavior for add-on satellites.
Orbi WiFi system LEDs
The following table describes the LED behavior for an Orbi router and Orbi satellites
that are purchased together and come in the same package.
Table 1. Orbi WiFi System router and satellite LED descriptions
LED BehaviorLED
The Power LED is located above the button on the rear panel. The wallPower On/Off Note:
plug satellite does not include a Power LED.
•Solid green. Power is on.
•Solid amber. The router or satellite is booting.
•Blinking amber. The router or satellite is resetting to factory default settings.
•Blinking red. The rmware is corrupted.
•Off. Power is not supplied.
Power LED
The ring LED is located on the top.
•Pulsing white Sync. The router is booting or someone pressed the button.
•Off. The router nished booting and is working normally.
•Solid white. The router is resetting to factory default settings.
•Solid magenta. The router cannot connect to the Internet. See You cannot access the Internet
on page 135.
Router ring LED
This satellite is included when you buy an Orbi router. The ring LED is located on the top.
•Pulsing white. The satellite is booting.
•Blue for three minutes. The connection between the satellite and the router is good.
•Amber for three minutes. The connection between the satellite and the router is fair.
•Magenta. The satellite failed to sync to the router. See The router and satellite do not sync
on page 133.
•Off. The satellite synced to the router and is working normally.
Satellite ring
LED
Optional Orbi add-on satellite LEDs
You can purchase add-on Orbi satellites (sold separately) and add them to your Orbi
network.
User Manual9Overview
Orbi WiFi System

Table 2. Orbi add-on satellite LED description
LED BehaviorLED
The Power LED is located above the button on the rear panel. The wallPower On/Off Note:
plug satellite does not include a Power LED.
•Solid green. Power is on.
•Solid amber. The satellite is rebooting.
•Blinking amber. The satellite is resetting to factory default settings.
•Blinking red. The rmware is corrupted.
•Off. Power is not supplied.
Power LED
Optional add-on satellites are sold separately and can be added to your Orbi network. The
ring LED is located on the top.
•Pulsing white. The satellite is booting.
•Solid white Sync. The satellite is ready to sync to the router (press the button).
•Blue for three minutes. The connection between the satellite and the router is good.
•Amber for three minutes. The connection between the satellite and the router is fair.
•Magenta. The satellite is not connected to the router or is not getting an IP address.
•Off. The satellite synced to the router and is working normally.
Add-on satellite
ring LED
Connect your router
To cable your router:
1. Unplug your modem’s power, leaving the modem connected to the wall jack for
your Internet service.
If your modem uses a battery backup, remove the battery.
2. Plug in and turn on your modem.
If your modem uses a battery backup, put the battery back in.
3. Connect your modem to the Internet port of your router with the yellow Ethernet
cable that came with your router.
4. Connect the power adapter to your router and plug the power adapter into an outlet.
5. If the Power LED does not light, press the button on the rear panelPower On/Off
of the router.
User Manual10Overview
Orbi WiFi System

Place your satellite
If your satellite came with your Orbi WiFi System, the satellite attempts to sync with your
router. If you bought an add-on satellite, you must manually sync your satellite. For more
information, see Sync your Orbi satellite on page 11.
Note that your satellites must be within range of your router’s WiFi signal in order for it
to sync with the router. Use each satellite’s ring LED to help you determine where to
place your satellite.
Sync your Orbi satellite
The sync process for your satellite depends on whether your satellite came with your
Orbi WiFi System, or if your satellite is an add-on satellite.
Sync a satellite from an Orbi wi system
The Orbi WiFi System includes an Orbi router and either one or two satellites. The
satellite in the WiFi system is preset to automatically nd and sync to the WiFi signal
from the Orbi router in the same WiFi system.
To sync your satellite:
1. Place your satellite.
For more information, see Place your satellite on page 11.
2. Connect the satellite to a power source.
3. If the Power LED on the back of the satellite does not light, press the Power On/Off
button.
The satellite ring LED pulses white. The satellite automatically nds the Orbi router’s
WiFi signal and attempts to sync to the Orbi router.
The satellite ring LED lights one of the following colors for about three minutes and
then turns off:
•Blue. The Orbi router and satellite successfully synced, and the connection
between the router and satellite is good.
•Amber. The Orbi router and satellite successfully synced, and the connection
between the router and satellite is fair. Consider moving the Orbi satellite closer
to the Orbi router.
•Magenta. The Orbi router and satellite failed to sync.
User Manual11Overview
Orbi WiFi System

4. If the satellite ring LED is magenta, move the satellite closer to the router and then
sync the satellite to the router:
a. Press the button on the back of the router.Sync
b. Within two minutes, press the button on the back of the satellite.Sync
The satellite attempts to sync to the Orbi router. The satellite ring LED lights blue,
amber, or magenta as described in Step 3 of this procedure and then turns off.
5. Repeat Steps 1–4 if your Orbi WiFi System came with a second satellite.
Sync an add-on satellite
If you already set up an Orbi router and satellite and are adding an optional add-on
satellite (sold separately), follow these steps.
To sync your add-on satellite:
1. Place your satellite.
Make sure that your satellite is within range of your Orbi router’s WiFi signal.
2. Connect the satellite to a power source.
3. If the Power LED on the back of the satellite does not light, press the Power On/Off
button.
4. Wait about two minutes for the satellite ring LED to light solid white.
5. Press the button on the back of the satellite and within two minutes, press theSync
Sync button on the back of your Orbi router.
The satellite ring LED pulses white, then lights one of the following colors for about
three minutes, and then turns off:
•Blue. The Orbi router and satellite successfully synced, and the connection
between the router and satellite is good.
•Amber. The Orbi router and satellite successfully synced, and the connection
between the router and satellite is fair. Consider moving the Orbi satellite closer
to the Orbi router.
•Magenta. The Orbi router and satellite failed to sync. Move the satellite closer
to the router and try again.
Log in to your router and add satellites to your network
You can use the router web interface to add a satellite to your Orbi network.
User Manual12Overview
Orbi WiFi System

To add a satellite to your Orbi network using the router web interface:
1. Launch a web browser from a computer or mobile device that is connected to your
Orbi network.
2. Enter .orbilogin.com
A login window opens.
3. Enter the router admin user name and password.
The user name is . The default password is . The user name andadmin password
password are case-sensitive.
The BASIC Home page displays.
4. Select .Add Orbi Satellite
The Place Your Satellite page displays.
5. Follow the instructions about where to place your satellite in your house.
6. Connect the satellite to a power source.
7. If the Power LED on the back of the satellite does not light, press the Power On/Off
button.
8. Click the button.NEXT
9. Wait about two minutes for the satellite’s ring LED to light solid white.
10. Press the button on the satellite.Sync
The satellite’s ring LED pulses white.
11. Click the button in the router web interface.SYNC
The router attempts to sync with the satellite.
The satellite’s ring LED lights one of the following colors for about three minutes
and then turns off:
•Blue. The Orbi router and satellite successfully synced, and the connection
between the router and satellite is good.
•Amber. The Orbi router and satellite successfully synced, and the connection
between the router and satellite is fair. Consider moving the Orbi satellite closer
to the Orbi router.
•Magenta. The Orbi router and satellite failed to sync. Move the satellite closer
to the router and try again.
User Manual13Overview
Orbi WiFi System

Set up an Ethernet backhaul connection
Your Orbi satellite automatically connects wirelessly to your Orbi router or another Orbi
satellite to create a wireless backhaul, or you can use an Ethernet cable to connect your
satellite to your router or another satellite to create a wired backhaul connection.
Before you set up an Ethernet backhaul connection, make sure that you update the
rmware on all your Orbi devices.
The following image shows how to connect your Orbi satellites to your Orbi router to
create an Ethernet backhaul connection.
Figure 1. Satellites connected to the router’s Ethernet ports
User Manual14Overview
Orbi WiFi System

The following image shows another way to connect your Orbi satellites to your Orbi
router to create an Ethernet backhaul connection.
Figure 2. Satellite 1 connected to router and satellite 2 connected to satellite 1
The following image shows how to connect your Orbi satellites and your Orbi router to
an Ethernet switch.
Note: The Ethernet ports on the Orbi router and satellite are rated at 1 Gbps. Make
sure the switch ports are 1 Gbps or faster.
Figure 3. Ethernet backhaul connection using a switch
User Manual15Overview
Orbi WiFi System
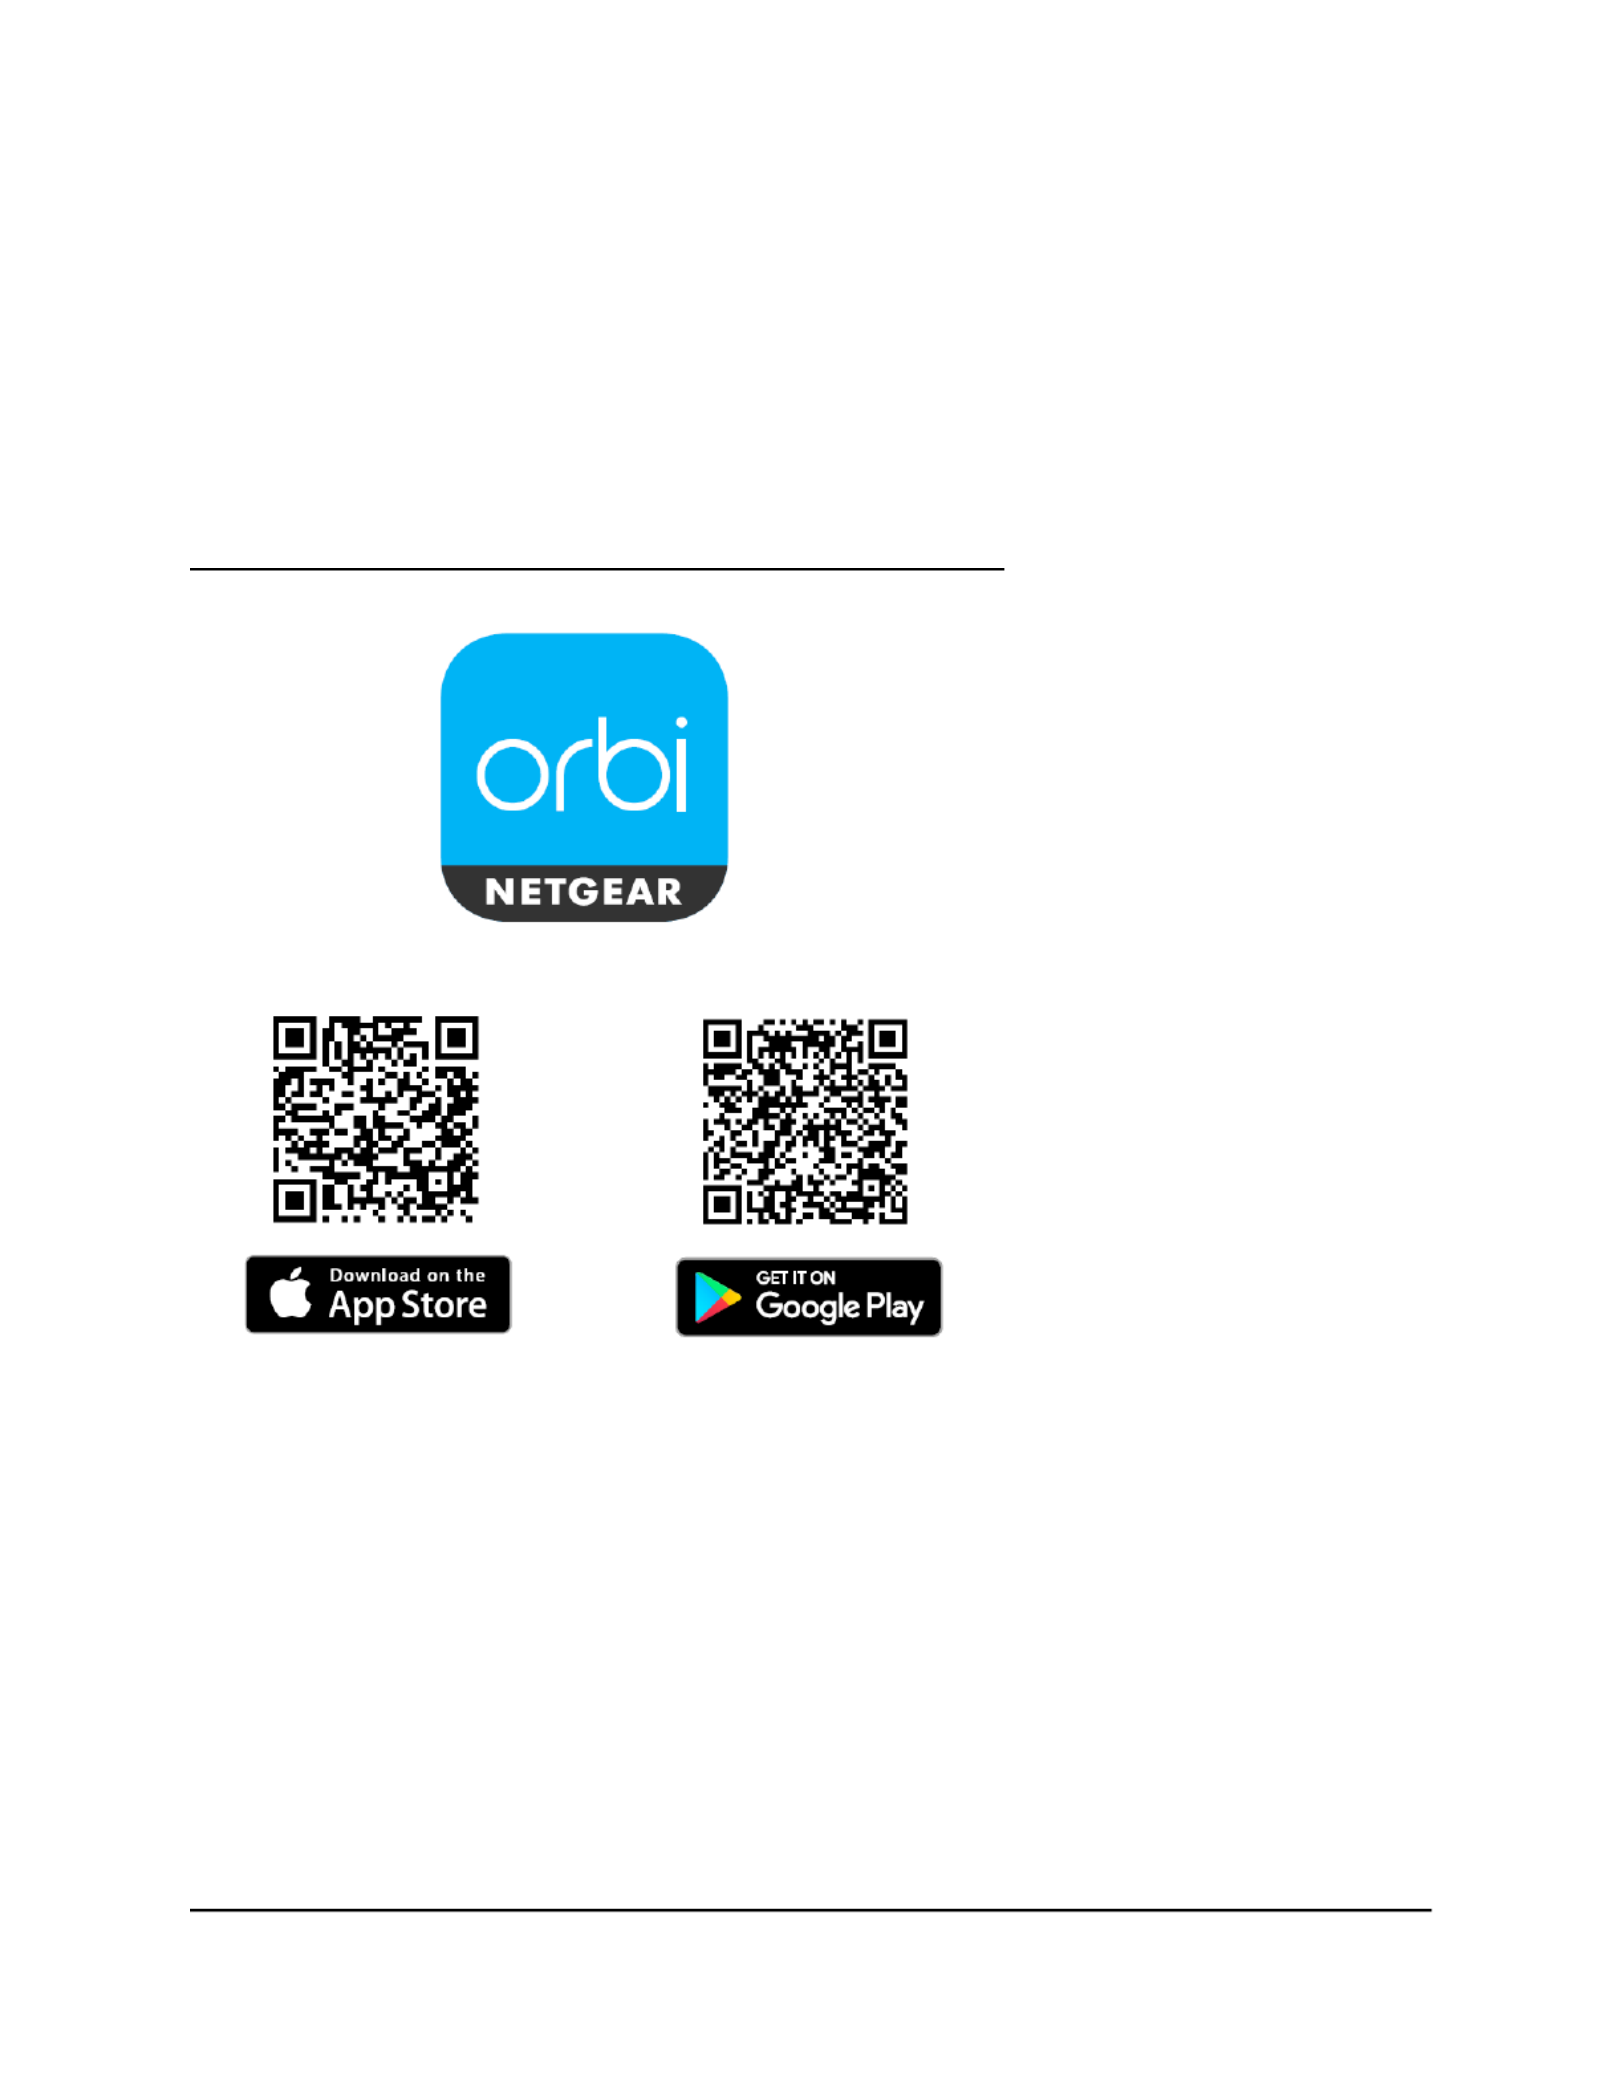
Download the NETGEAR Orbi app
You can use the NETGEAR Orbi app to set up and access your Orbi network.
To nd the app, scan a QR code or search for NETGEAR Orbi in the Apple App Store
or Google Play Store. Launch the NETGEAR Orbi app on your mobile device and follow
the prompts.
For more information about the Orbi app, visit
https://www.netgear.com/home/apps-services/orbi-app.
User Manual16Overview
Orbi WiFi System

2
Connect to the Network and Access
the Router
This chapter contains the following sections:
• Connect to the network
• Labels
• Types of logins
• Use a web browser to access the router
• Change the language
17

Connect to the network
You can connect to the Orbi network through a wired or WiFi connection. If you set up
your computer to use a static IP address, change the settings so that it uses Dynamic
Host Conguration Protocol (DHCP).
Wired connection
You can connect your computer to the router using an Ethernet cable and join the
router’s local area network (LAN). The computer must have an Ethernet port.
To connect your computer to the router with an Ethernet cable:
1. Make sure that the router is receiving power (its Power LED is lit).
2. Connect an Ethernet cable to an Ethernet port on your computer.
3. Connect the other end of the Ethernet cable to one of the router’s Ethernet ports.
Your computer connects to the local area network (LAN). A message might display
on your computer screen to notify you that an Ethernet cable is connected.
WiFi connection
If you're installing your Orbi router for the rst time, you can connect to the router's
WiFi network by scanning the QR code on your router with the camera app on your
mobile device. To scan the QR code with your camera app, your mobile device must
have iOS version 11 or later or Android version 10 or later.
You can also manually nd and select the Orbi router's WiFi network from your
WiFi-enabled computer or mobile device.
To nd and select the WiFi network:
1. Make sure that the router or satellite is receiving power (its Power LED is lit).
2. On your WiFi-enabled computer or mobile device, nd and select the WiFi network.
The WiFi network name is on the router label. The WiFi network name is the same
for the router and the satellite in the Orbi WiFi System.
Note: If you bought the router and the satellite separately, their default WiFi network
names are different.
3. Join the WiFi network and enter the WiFi password.
The password is on the router label.
Your WiFi-enabled computer or mobile device connects to the WiFi network.
User Manual18Connect to the Network and
Access the Router
Orbi WiFi System
WiFi connection using WPS
You can connect to the router’s WiFi network with Wi-Fi Protected Setup (WPS) or you
can nd and select the WiFi network.
To use WPS to connect to the WiFi network:
1. Make sure that the router is receiving power (its Power LED is lit).
2. Check the WPS instructions for your computer or WiFi device.
3. Press the button on the router.Sync
4. Within two minutes, on your WiFi-enabled computer or mobile device, press its WPS
button or follow its instructions for WPS connections.
Your computer or mobile device connects to the WiFi network.
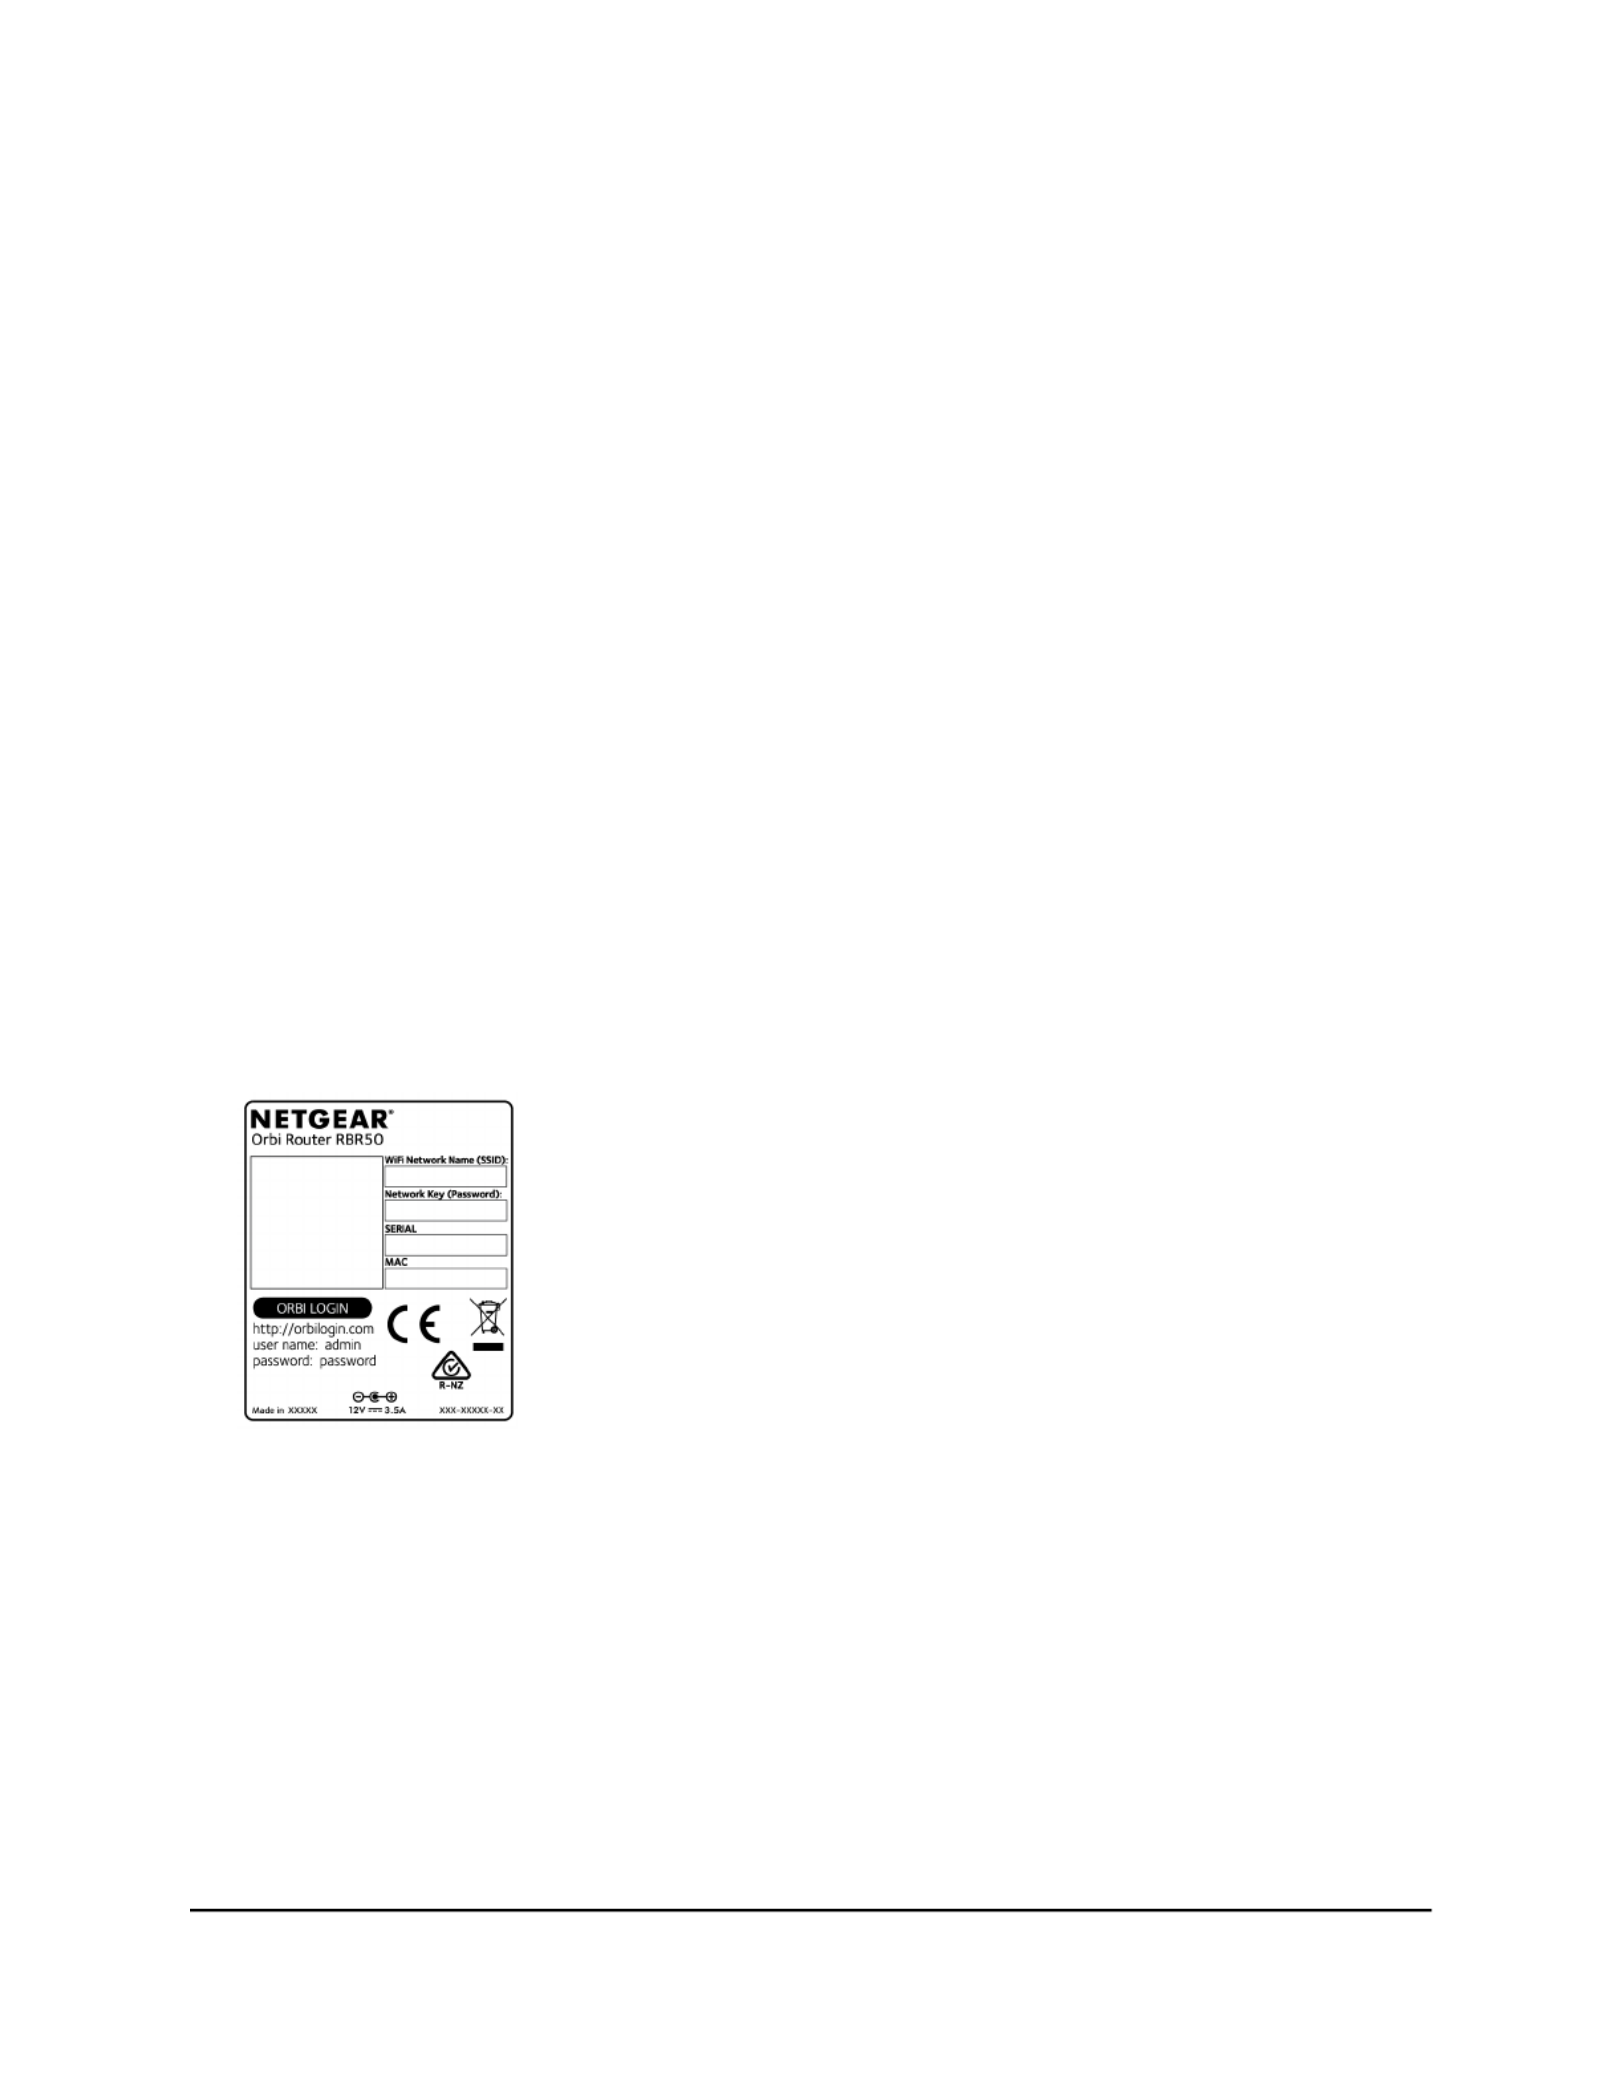
Labels
The router label shows the login information, the WiFi network name and password,
the router’s MAC address, and the router’s serial number. The following is an example
of what the router label might look like:
Figure 4. Router label
The satellite label shows the WiFi network name and password, the satellite’s MAC
address, and the satellite’s serial number. The following is an example of what the
satellite label might look like:
User Manual19Connect to the Network and
Access the Router
Orbi WiFi System
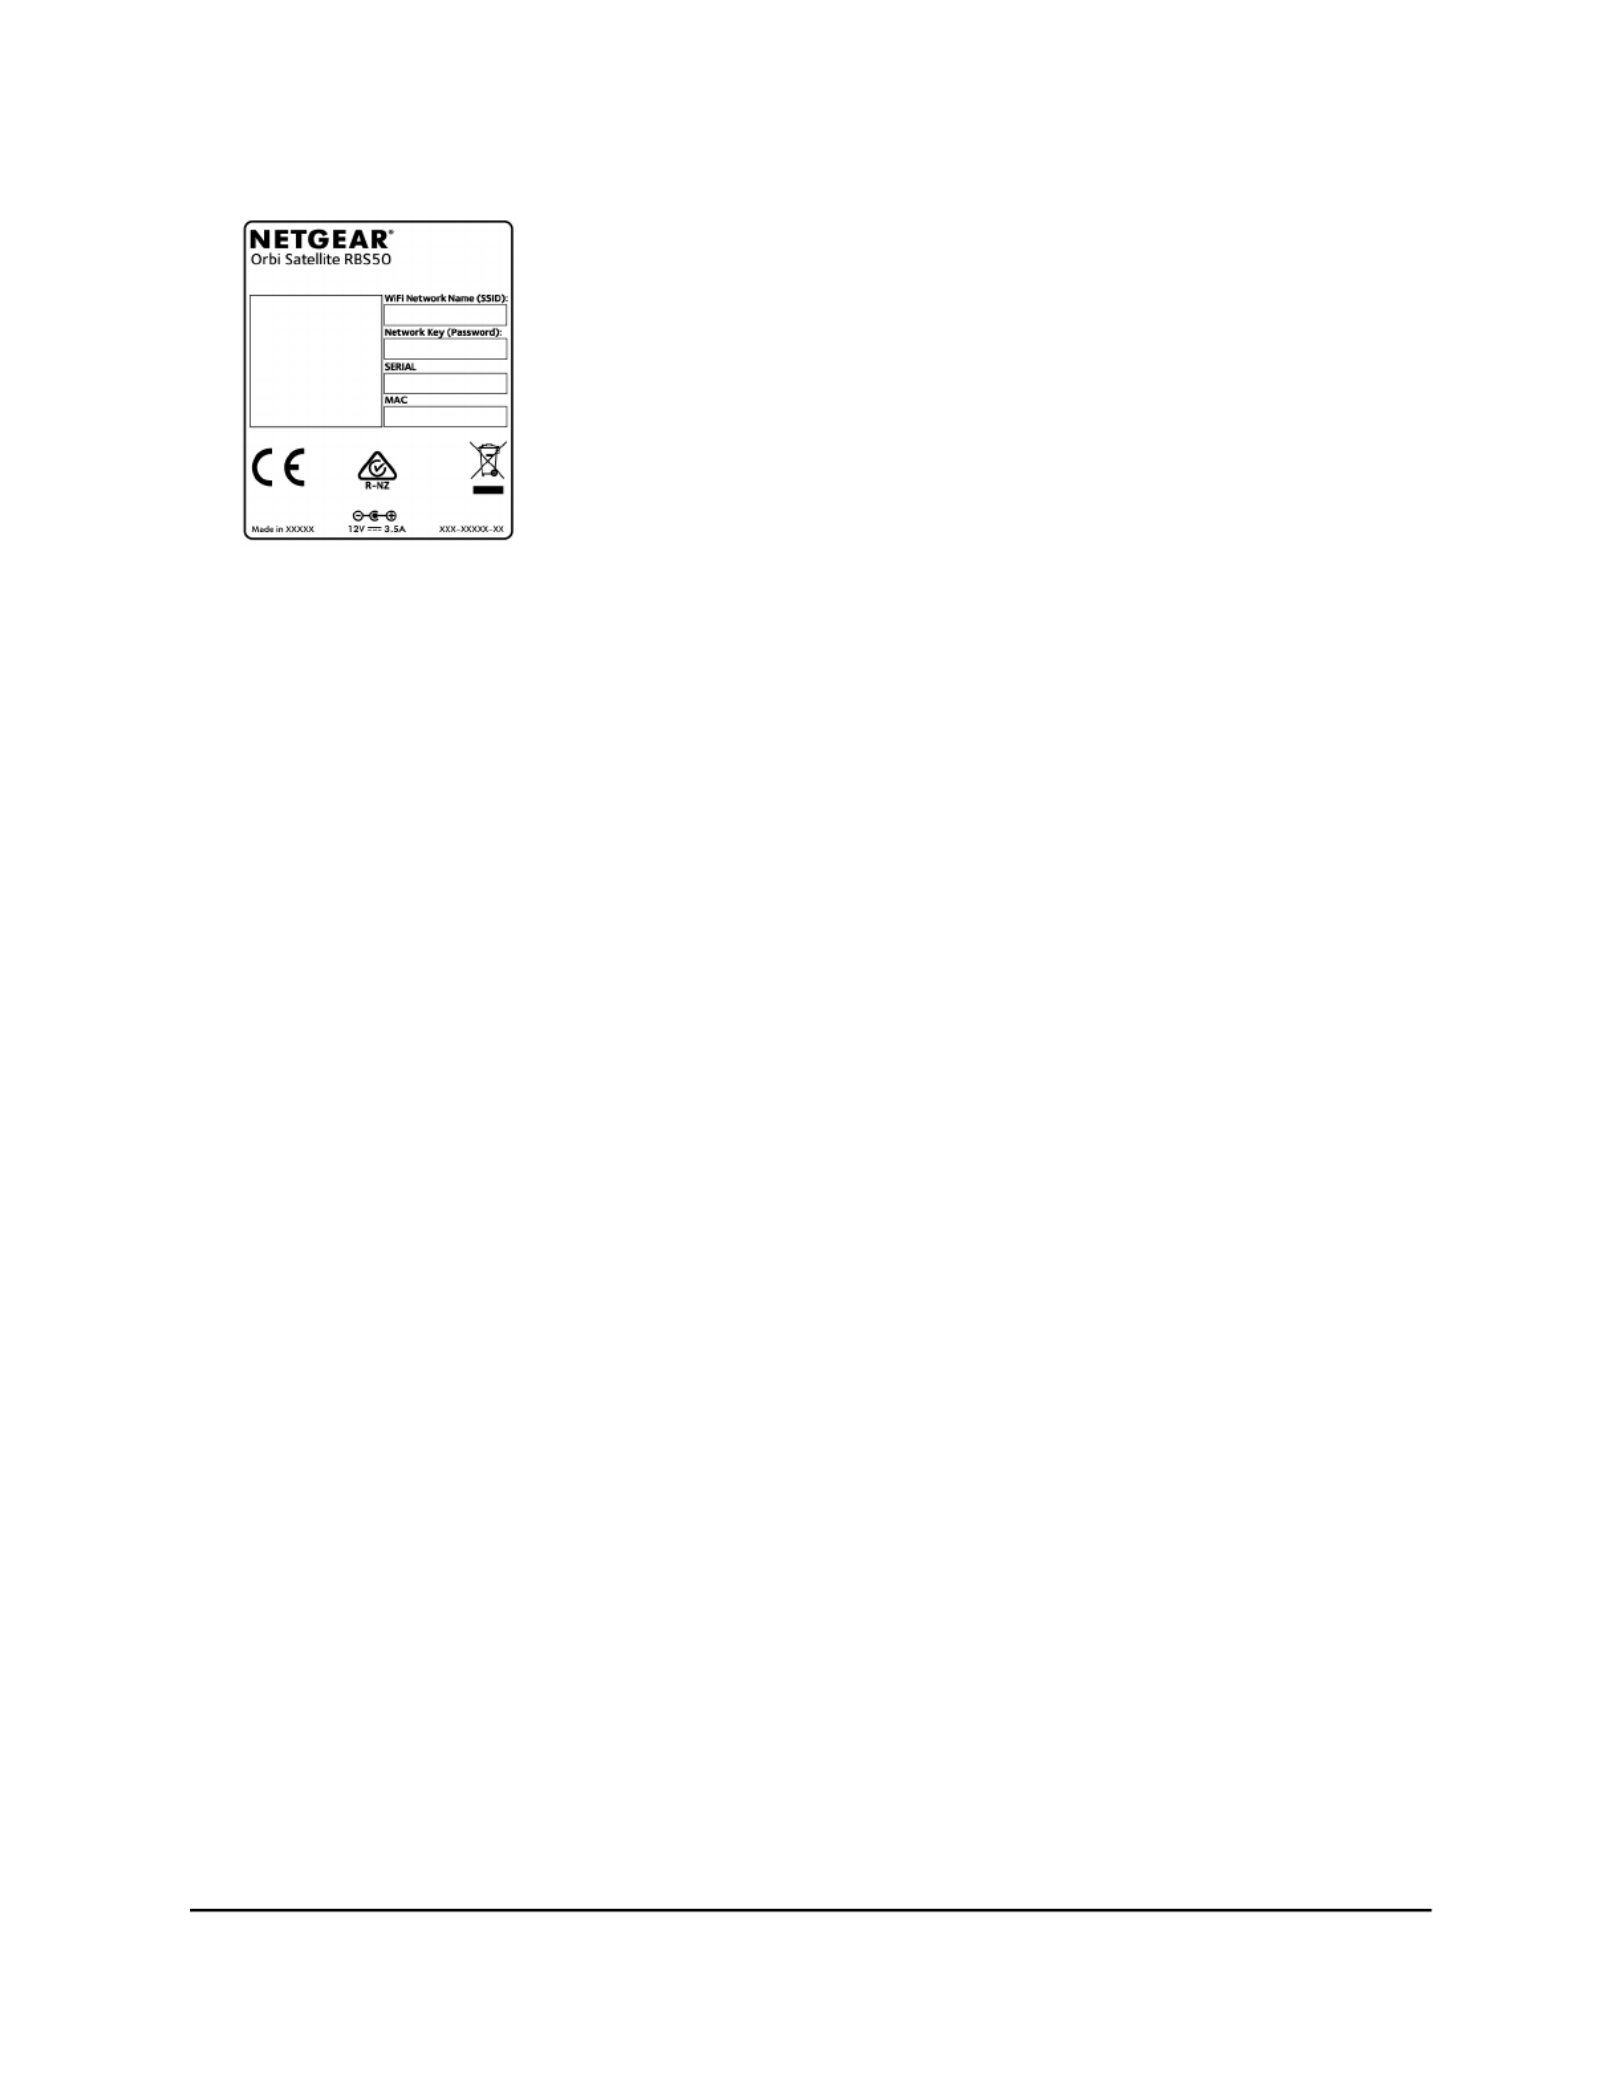
Figure 5. Satellite label
Types of logins
Separate types of logins serve different purposes. It is important that you understand
the difference so that you know which login to use when.
Types of logins:
•Internet service login. The login that your Internet service provider (ISP) gave you
logs you in to your Internet service. Your service provider gave you this login
information in a letter or some other way. If you cannot nd this login information,
contact your service provider.
•WiFi network key or password. Your router and satellite are preset with the same
WiFi network name (SSID) and password for WiFi access. This information is on the
router label and the satellite label.
•Router login. This logs you in to the router interface from a web browser as admin.
Use a web browser to access the router
When you connect to the network (either with WiFi or with an Ethernet cable), you can
use a web browser to access the router to view or change its settings. The rst time you
access the router, the NETGEAR installation assistant automatically checks to see if your
router can connect to your Internet service.
Use the automatic Internet setup option
You can set up your router automatically, or you can use a web browser to access the
router and set up your router manually. Before you start the setup process, get your ISP
User Manual20Connect to the Network and
Access the Router
Orbi WiFi System

information and make sure that the computers and devices in the network use the
settings described here.
When your Internet service starts, your Internet service provider (ISP) typically gives you
all the information needed to connect to the Internet. For DSL service, you might need
the following information to set up your router:
•The ISP conguration information for your DSL account
•ISP login name and password
•Fixed or static IP address settings (special deployment by ISP; this setting is rare)
If you cannot locate this information, ask your ISP to provide it. When your Internet
connection is working, you no longer need to launch the ISP login program on your
computer to access the Internet. When you start an Internet application, your router
automatically logs you in.
Installation and basic setup takes about 15 minutes to complete.
To automatically set up your router:
1. Power on your router.
2. Make sure that your WiFi-enabled computer or mobile device is connected to the
router with an Ethernet cable (wired) or wirelessly with the preset security settings
listed on the label.
Note: If you want to change the router’s WiFi settings, use a wired connection to
avoid being disconnected when the new WiFi settings take effect.
3. Launch a web browser.
The page that displays depends on whether you accessed the router before:
•The rst time that you set up the Internet connection for your router, the browser
goes to , and the Orbi login page displays.orbilogin.com
•If you already set up the Internet connection, enter in the addressorbilogin.com
eld for your browser to start the installation process.
4. Follow the onscreen instructions.
The router connects to the Internet.
5. If the browser does not display the web page, do the following:
•Make sure that the computer is connected to one of the LAN Ethernet ports or
over WiFi to the router.
•Make sure that the router is receiving power, and that its Power LED is lit.
•Close and reopen the browser or clear the browser cache.
User Manual21Connect to the Network and
Access the Router
Orbi WiFi System

•Browse to orbilogin.com.
•If the computer is set to a static or xed IP address (this setting is uncommon),
change it to obtain an IP address automatically from the router.
6. If the router does not connect to the Internet, do the following:
a. Review your settings.
b. Make sure that you selected the correct options and typed everything correctly.
c. Contact your ISP to verify that you are using the correct configuration information.
d. Read Troubleshooting on page 132.
If problems persist, register your NETGEAR product and contact NETGEAR
technical support.
Log in to the Orbi router web interface
When you log in to the Orbi, the browser displays the router web interface. You can
use the router web interface to change the router or satellite settings.
To log in to your Orbi:
1. Launch a web browser from a computer or mobile device that is connected to your
Orbi network.
2. Enter .orbilogin.com
A login window opens.
3. Enter the router admin user name and password.
The user name is . The password is the one that you specied the rst timeadmin
that you logged in. The user name and password are case-sensitive.
The BASIC Home page displays.
Change the language
By default, the language is set as Auto.
To change the language:
1. Launch a web browser from a computer or mobile device that is connected to your
Orbi network.
2. Enter .orbilogin.com
A login window opens.
User Manual22Connect to the Network and
Access the Router
Orbi WiFi System

3. Enter the router admin user name and password.
The user name is . The password is the one that you specied the rst timeadmin
that you logged in. The user name and password are case-sensitive.
The BASIC Home page displays.
4. In the upper right corner, select a language from the menu.
5. When prompted, click the button to conrm this change.OK
The page refreshes with the language that you selected.
User Manual23Connect to the Network and
Access the Router
Orbi WiFi System

3
Specify Your Internet Settings
Usually, the quickest way to set up the router to use your Internet connection is to allow
Orbi to detect the Internet connection when you rst access the router with a web
browser. You can also customize or specify your Internet settings.
This chapter contains the following sections:
• Use the Setup Wizard
• Manually set up the Internet connection
• Requirements for entering IPv6 addresses
• Change the MTU size
24

Specify IPv6 Internet connections
You can set up an IPv6 Internet connection if the router does not detect it automatically.
To set up an IPv6 Internet connection:
1. Launch a web browser from a computer or mobile device that is connected to your
Orbi network.
2. Enter .orbilogin.com
A login window opens.
3. Enter the admin user name and password.
The user name is . The password is the one that you specied the rst timeadmin
that you logged in. The user name and password are case-sensitive.
The BASIC Home page displays.
4. Select .ADVANCED > Advanced Setup > IPv6
The IPv6 page displays.
5. From the menu, select the IPv6 connection type:Internet Connection Type
•If you are not sure, select so that the router detects the IPv6 typeAuto Detect
that is in use.
•If your Internet connection does not use PPPoE, DHCP, or xed, but is IPv6, select
Auto Cong.
Your Internet service provider (ISP) can provide this information.
For more information about IPv6 Internet connection, see the following sections:
•Use auto detection for an IPv6 Internet connection on page 30
•Use auto conguration for an IPv6 Internet connection on page 31
•Set up an IPv6 6rd tunnel Internet connection on page 32
•Set up an IPv6 6to4 tunnel Internet connection on page 34
•Set up an IPv6 pass-through Internet connection on page 36
•Set up an IPv6 xed Internet connection on page 37
•Set up an IPv6 DHCP Internet connection on page 38
•Set up an IPv6 PPPoE Internet connection on page 40
6. Click the button.Apply
Your settings are saved.
User Manual29Specify Your Internet Settings
Orbi WiFi System

6. Select an radio button:IPv6 Domain Name Server (DNS) Address
•Get Automatically from ISP. Your ISP uses DHCP to assign your DNS servers.
Your ISP automatically assigns this address.
•Use These DNS Servers. If you know that your ISP requires specific servers, select
this option. Enter the IP address of your ISP’s primary DNS server. If a secondary
DNS server address is available, enter it also.
7. Select an radio button:IP Address Assignment
•Use DHCP Server. This method passes more information to LAN devices, but
some IPv6 systems might not support the DHCv6 client function.
•Auto Cong. This is the default setting.
This setting species how the router assigns IPv6 addresses to the devices on your
home network.
8. (Optional) Select the check box and specify the interface IDUse This Interface ID
that you want to be used for the IPv6 address of the router’s LAN interface.
If you do not specify an ID here, the router generates one automatically from its MAC
address.
9. Select an radio button:IPv6 Filtering
•Secured. In secured mode, which is the default mode, the router inspects both
TCP and UDP packets.
•Open. In open mode, the router inspects UDP packets only.
10. Click the button.Apply
Your settings are saved.
Set up an IPv6 6to4 tunnel Internet connection
The remote relay router is the router to which your router creates a 6to4 tunnel. Make
sure that the IPv4 Internet connection is working before you apply the 6to4 tunnel
settings for the IPv6 connection.
To set up an IPv6 Internet connection by using a 6to4 tunnel:
1. Launch a web browser from a computer or mobile device that is connected to your
Orbi network.
2. Enter .orbilogin.com
A login window opens.
User Manual34Specify Your Internet Settings
Orbi WiFi System
Especificaciones del producto
| Marca: | Netgear |
| Categoría: | Casa inteligente |
| Modelo: | Wall-Plug Satellite Model RBW30 |
¿Necesitas ayuda?
Si necesitas ayuda con Netgear Wall-Plug Satellite Model RBW30 haz una pregunta a continuación y otros usuarios te responderán
Casa inteligente Netgear Manuales

2 Octubre 2024
16 Agosto 2024
1 Agosto 2024
Casa inteligente Manuales
- Casa inteligente Xiaomi
- Casa inteligente Bosch
- Casa inteligente IKEA
- Casa inteligente Philips
- Casa inteligente Panasonic
- Casa inteligente Gigaset
- Casa inteligente Honeywell
- Casa inteligente Abus
- Casa inteligente Acer
- Casa inteligente Ajax
- Casa inteligente Alecto
- Casa inteligente Aluratek
- Casa inteligente Airlive
- Casa inteligente Brennenstuhl
- Casa inteligente Hikvision
- Casa inteligente Nedis
- Casa inteligente Livoo
- Casa inteligente Manta
- Casa inteligente Asus
- Casa inteligente Caliber
- Casa inteligente Niceboy
- Casa inteligente Blaupunkt
- Casa inteligente TP Link
- Casa inteligente Ezviz
- Casa inteligente Trust
- Casa inteligente Elro
- Casa inteligente EMOS
- Casa inteligente KlikaanKlikuit
- Casa inteligente KKT Kolbe
- Casa inteligente Denver
- Casa inteligente Energenie
- Casa inteligente Imou
- Casa inteligente Hama
- Casa inteligente Gardena
- Casa inteligente Theben
- Casa inteligente Velleman
- Casa inteligente Smartwares
- Casa inteligente Technisat
- Casa inteligente Krüger And Matz
- Casa inteligente Salus
- Casa inteligente Eufy
- Casa inteligente Steren
- Casa inteligente Perel
- Casa inteligente Burg-Wachter
- Casa inteligente Somfy
- Casa inteligente Devolo
- Casa inteligente Sanus
- Casa inteligente LevelOne
- Casa inteligente DIO
- Casa inteligente Hive
- Casa inteligente Danfoss
- Casa inteligente Netatmo
- Casa inteligente Inkbird
- Casa inteligente FireAngel
- Casa inteligente Chacon
- Casa inteligente Hombli
- Casa inteligente Reolink
- Casa inteligente Naxa
- Casa inteligente Trevi
- Casa inteligente Busch-Jaeger
- Casa inteligente D-Link
- Casa inteligente Logicom
- Casa inteligente Swann
- Casa inteligente Tenda
- Casa inteligente Vivax
- Casa inteligente Delta Dore
- Casa inteligente Niko
- Casa inteligente Rain Bird
- Casa inteligente Veho
- Casa inteligente Gira
- Casa inteligente Jung
- Casa inteligente Ring
- Casa inteligente ATen
- Casa inteligente Nobo
- Casa inteligente Digi
- Casa inteligente Fibaro
- Casa inteligente Ranex
- Casa inteligente Easy Home
- Casa inteligente Qnect
- Casa inteligente Nexa
- Casa inteligente Fanvil
- Casa inteligente August
- Casa inteligente Dormakaba
- Casa inteligente Aiphone
- Casa inteligente EQ3
- Casa inteligente Homematic IP
- Casa inteligente Home Easy
- Casa inteligente X-Sense
- Casa inteligente SPC
- Casa inteligente Crestron
- Casa inteligente Chuango
- Casa inteligente ETiger
- Casa inteligente Swisstone
- Casa inteligente Drayton
- Casa inteligente Aqara
- Casa inteligente Osram
- Casa inteligente LSC Smart Connect - Action
- Casa inteligente Ferguson
- Casa inteligente MAC
- Casa inteligente Redmond
- Casa inteligente KanexPro
- Casa inteligente Shelly
- Casa inteligente Oregon Scientific
- Casa inteligente Silvergear
- Casa inteligente Paulmann
- Casa inteligente Kogan
- Casa inteligente Intertechno
- Casa inteligente EKO
- Casa inteligente V-Tac
- Casa inteligente EQ-3
- Casa inteligente Schellenberg
- Casa inteligente EVOLVEO
- Casa inteligente Aeotec
- Casa inteligente Gossen Metrawatt
- Casa inteligente Adurosmart
- Casa inteligente Brilliant
- Casa inteligente Nous
- Casa inteligente SEC24
- Casa inteligente Athom
- Casa inteligente Casambi
- Casa inteligente Tellur
- Casa inteligente TELE System
- Casa inteligente Iungo
- Casa inteligente Tjilla
- Casa inteligente SwitchBot
- Casa inteligente Mach Power
- Casa inteligente Sonoff
- Casa inteligente Airthings
- Casa inteligente Blebox
- Casa inteligente Lutron
- Casa inteligente Meross
- Casa inteligente Origin Acoustics
- Casa inteligente Winland
Últimos Casa inteligente Manuales
27 Octubre 2024
20 Octubre 2024
18 Octubre 2024
16 Octubre 2024
16 Octubre 2024
13 Octubre 2024
9 Octubre 2024
6 Octubre 2024
3 Octubre 2024
2 Octubre 2024